A creative project using apron technology is ready. Creative project (apron)


From history... Aprons, or aprons, are familiar to almost every person. During work, they are reliable protectors from dirt. In addition, this is a good decoration for women’s attire, and work aprons were included in the professional clothing set. An apron is a widespread and almost unchanged part of clothing from ancient times to the present day. Over time, the apron became a ubiquitous type of clothing. This part of the clothing played a very important role in the attire of rulers, as evidenced by numerous monuments. Since the Middle Ages, the apron has practically become a permanent part of work clothes.


Selecting the fabric and color scheme: The fabric for making an apron must meet the following requirements: The fabric for making an apron must meet the following requirements: Hygienic - the fabric must be smooth, not lint-free (it gets dirty a little and washes well). Hygienic - the fabric should be smooth, not fluffy (it gets dirty a little and washes well). Aesthetic - the fabric should be light in color, this is more hygienic and makes it possible to use various finishes, but if the fabric has a pattern, it is better that it be small. Aesthetic - the fabric should be light in color, this is more hygienic and makes it possible to use various finishes, but if the fabric has a pattern, it is better that it be small. Aprons can be sewn from various fabrics: linen, silk, cotton. Aprons can be sewn from various fabrics: linen, silk, cotton.


Cutting order: Prepare the pattern for cutting Prepare the pattern for cutting Prepare the fabric for cutting Prepare the fabric for cutting Lay out the pattern on the fabric Lay out the pattern on the fabric Trace the details with chalk next to the outline of the pattern - the seams will run along these lines Trace the details with chalk next to the outline of the pattern - according The seams will run along these lines. Trace the outline of the pattern again, moving away from it by the width of the allowance. Trace the outline of the pattern again, moving away from it by the width of the allowance. Mark the location of the pocket Mark the location of the pocket Cut the fabric along the second lines Cut the fabric along the second lines

Technological sequence: Laying out the pattern on the fabric, cutting Laying out the pattern on the fabric, cutting Laying copy stitches Laying copy stitches Processing the straps Processing the straps and ends of the belt Processing the straps Processing the apron sections Processing the apron sections Connecting the straps and belt with the apron Processing the patch pocket Processing the patch pocket Connecting the pocket with an apron

Ufa – 2017
Introduction 4 pages
Main part
Study of the problem 5-6pp.
Goals and objectives 7pp.
Justification of the topic of the selected project 8-10 pages.
Technological sequence for processing the apron 10-12 pages.
Product cost 12-14 pages.
Conclusion page 14
Appendix 15 pages.
Literature 18 pages
Introduction
In our family, the kitchen is the place where we like to gather together. We also have a tradition - once a month, each family member prepares their favorite dish. I'm in the experimentation stage and that's why my clothes get very dirty. To keep your clothes clean, you need an apron. My mother and grandmother have an apron, but I don’t have one yet, so I decided to sew it myself. Knowledge of technology and the ability to sew on a sewing machine will help me correctly complete my goal: complete the project “Making an apron sewing product.”
I will also be using additional backsplash books as I go along.
In order to sew an apron, I will need: fabric, thread, scissors, a needle and a sewing machine.
In the process of carrying out project work, I set myself the following tasks:
learn what an apron is;
find out when the first aprons appeared, what they were like before;
research fabrics for sewing an apron;
describe the process of making an apron;
Sew a neat apron.
Main part
Research the problem
Apron(from Vortuch fartuch ) (or apron , cufflink, Sometimes hem ) - Designed to protect clothes from dirt during kitchen work. Invented in 1208.
An apron is a widespread and almost unchanged part of clothing from ancient times to the present day.
Its history begins with Ancient Egypt. Already in the early period of the existence of this country, men in public service used primitive drapery, attached in front to a belt, which was a narrow strip of leather or knitted (woven) reed stalks.
Over time, the apron has become a ubiquitous type of clothing. It was a piece of fabric, the middle part of which, gathered into folds, was applied to the body in front, the rest was wrapped around the body and fastened with the free end tucked behind the middle part. The apron was held on with a belt. Its middle part had a trapezoidal, triangular or fan-shaped shape.
Since the Middle Ages, the apron has become an almost permanent part of work clothes. The apron was worn by blacksmiths, shoemakers, cooks... Guild masters considered the apron an integral part of their professional clothing.
Over time, a woman's apron became an accessory to a married woman's toilet. In the 16th century, two aprons made up a skirt. In the 17th century, the apron certainly adorned the wives of eminent citizens. In Germany, the wives of burghers wore aprons (white or colored), sometimes even double (front and back).
The apron periodically came into fashion among the upper classes.
French women at home and on walks during the reign of Louis XIV (1660-1710) wore a small apron with rich trim around the edge.
It turns out that in the 18th century in Russia an apron was called an apron or a curtain, and only women wore it. The traditional Russian apron was made from homespun checkered fabric, with trim around the edges and red ties.
V.I. Dal in his explanatory dictionary of the Russian language gives the following definition of an apron: “An apron is an apron, a cufflink.”
Nowadays, both women and men wear aprons. The apron may have been the first piece of clothing worn specifically for work. It is used by people of various professions not only to avoid getting dirty; they carried tools, harvest fruits and other necessary things in it.
During the First World War, the apron turned out to be an absolutely necessary part of clothing. Many women had to do men's work: they became road workers, mechanics, etc. Thus, the apron turns from “maid clothes” into work clothes.
Perhaps, it was from this time that it ceased to exist as a purely decorative element and became an accessory of household clothing for work at home, also being industrial clothing.
Aprons can be sewn from various fabrics: linen, silk, cotton.
Linen fabrics They have a smooth, shiny surface, are distinguished by great strength and low elongation. They easily absorb moisture and wash well. Their disadvantage is that they wrinkle quickly, but they also smooth out just as quickly. These fabrics feel hard to the touch.
Silk fabrics they are soft and smooth to the touch, have a pleasant shine, are hygroscopic and breathable, but they stretch greatly, crumble, and have significant shrinkage. It is very difficult to sew from such fabrics without skills and experience.
According to historians and archaeologists, fabrics from cotton were produced in distant India back in the 11th century BC.
During the campaign of Alexander the Great, the Greeks were delighted with the art of the Indians, who knew how to produce fabrics from “wool extracted from nuts”
(that's what they called cotton). Until the end of the 13th century, only finished cotton products were imported into Europe. In 1772, the production of cotton fabric began in England. It had a unique texture and color.
Name " chintz“came to us in such a way that it is difficult even to immediately understand its original source. The Bengali name for the variegated cotton fabric “cheets” was changed by the Dutch to “sits”, and in our country it began to be called chintz.
Cotton fabrics have significant strength and hygroscopicity, quickly get wet and dry. They are comfortable to wear and hold up well to washing and ironing.
Sewing an apron is an almost waste-free production, because from leftover fabric I can sew a napkin using the patchwork technique.
Sewing an apron with your own hands is a profitable production! From an environmental point of view, the manufacturing process and operation of my product will not entail changes in the environment or disruptions in human life, since my apron is sewn from environmentally friendly materials, and I will not throw away the remaining fabric, but will sew a small napkin. Sewing process apron is an environmentally friendly production!
Functionally there are:
Goals and objectives : make an apron for culinary work in the kitchen, as well as for the purpose of consolidating the acquired knowledge, skills and abilities during its implementation; improve skills and techniques with fabric, with a sewing machine, deepen knowledge of materials processing technology, in the section “materials science”; develop creative initiative and a creative approach to work.
Sections of programs required to complete the project.
Materials Science.
Mechanical Engineering.
Artistic processing of fabric.
Construction.
Modeling.
Technological sequence.
Economics, entrepreneurship.
Organization of project implementation.
Justification of the problem and need.
Model selection.
Choice of fabric.
Selection of equipment.
Product design and modeling.
Open the products.
Technological sequence of product manufacturing.
Product cost.
Assessing the quality and complexity of the project.
Project protection.
Main problems of project implementation
Justification of the topic of the selected project .
Since I love to cook, I need an apron, but the store doesn’t have my size. I got the idea to sew it with my own hands.
Model selection.
For the project I will choose an apron from the following models that I found in fashion magazines:
Model No. 1.
Description of the model's appearance:
Apron with bib and patch pockets. The lower part of the apron and the pockets are rectangular. Fabric consumption.
The apron is made of cotton fabric.
Model No. 2.
The apron is cut at the waist, with a bib, without pockets. The upper section of the apron bib is trimmed with lace.
Fabric consumption.
The apron is made of chintz fabric. To finish the apron you will need lace.
Model No. 3.
The bib, the lower part of the apron, is oval. The wide pocket consists of three compartments. There is embroidery on the bib, pocket, towel, and potholder (instead of embroidery, you can make an applique by cutting out a finished design from fabric with a printed pattern).
Model No. 4
Set for culinary work, consisting of 2 aprons, a towel and an oven mitt. The lower part of the apron is trapezoidal. Done on the bib. The applique can be made from fabric of any color.
Model No. 5
The apron is cut at the waistline, with a bib and patch pockets. The lower part of the apron is oval-shaped, the lower and side sections of the apron are trimmed with embroidery. Fabric consumption.
The apron is made of cotton fabric. To finish the apron you will need floss.
My choice
Of the models presented to me, I chose model No. 5, because it suits my taste and work in the kitchen better. And all other aprons are more for work in production. Except for model No. 2;
Fabric selection .
For the selected project model, white cotton fabric is suitable, as it is durable, light, soft, and has good hygienic properties: it easily absorbs moisture, dries quickly, has good air permeability, and is easy to wash and iron. Cotton fabric is made from cotton fiber - an environmentally friendly product.
This apron can also be made of linen or waffle fabric.
Selection of equipment, tools, accessories .
1. Seagull sewing machine.
2. Overlock 51-A class.
3. Iron with steam humidifier, ironing board, ironing iron.
4. Cotton threads No. 40 - for machine work; No. 60 - for manual work for temporary purposes; No. 45-cotton with lavsan - for making appliqués.
5. Hand needle No. 3, machine needle No. 90, pins, scissors, thimble.
6. Ruler, measuring tape.
Auxiliary materials: paper for patterns, album with drawings, floss, hoop. fashion magazine
Apron design and modeling:
Calculation and construction according to Simonenko's textbook, grade 5, but according to our own standards.
Note: I looked at the modeling of the apron in the 5th grade technology textbook.
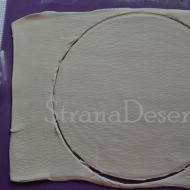
Cut out the apron .
I will cut the apron taking into account the direction of the grain thread, the front side, seam allowances, and the economical arrangement of cutting details on the fabric.
Technological sequence for processing the apron.
Preparing cutting details for processing .
1 Make straight stitches along the lines of the middle of the bib, the bottom of the apron, belt, and pockets.
2 Place straight copy stitches at the pocket locations.
Performing embroidery on a pocket.
1. The cockerel can be made with a chain stitch.
2. Flower petals and leaves can be embroidered using a “stitched loop” stitch.
3. The core of the flower can be decorated with beads or small beads or double-sided satin stitch.
Processing the bib .
1. Finish the side edges of the bib with a closed hem stitch.
2. Place the finished straps on the wrong side of the bib (with seams towards the middle), pin and baste to the wrong side of the bib. Place the facing over the straps, right side down. Align the top edges of the bib and facing.
Sweep the side sections of the facing onto the wrong side and iron, baste and stitch the facing with a seam width of 0.7 cm.
Fold the facing over to the front side of the bib and sweep away the seam.
Fold the bottom edge of the facing by 0.5 - 0.7 cm to the wrong side.
Insert the lace under the bottom edge of the facing. Baste and stitch 0.2 - 0.3 cm from the folded edge of the facing.
Hem the ends of the facing and lace with small oblique stitches.
Processing the bottom of the apron.
Loosen the tension of the upper thread, set the maximum stitch length to about 4 cm.
Overcast the stitching seam, bend it towards the apron and secure it in this position with running stitches.
Adjust the seam allowances to the apron along the front side by 0.1 - 0.2 mm from the fold.
Pocket processing.
Fold the seam allowance of the top edge of the pocket to the right side. Baste along the top edge of the pocket.
Stitch the top pocket seam allowance along the sides.
Turn the hem to the wrong side, straighten the corners, and iron.
Place a stitch along the rounded corners of the pocket for tightening, stepping back slightly inward from the intended line.
Baste the seam allowances to the wrong side and iron.
Connecting the pockets to the bottom of the apron with a patch seam.
Overlap and pin the pockets, aligning the sides with the copy stitches.
Baste and stitch pockets. Make fastenings on the upper corners.
Connection of the belt, bib with the lower part of the apron.
Place two parallel stitches along the top edge of the bottom of the apron to create gathers.
Pull the lower threads at the same time, distributing the gathering evenly.
Fold the bib with the lower part with the wrong sides inward, aligning the middles of the parts, and, aligning the cuts, pin.
Place the belt on the bib with the front side facing the front side of the bib, aligning and aligning the sections of the parts, baste and stitch.
Finish the ends of the belt with a backstitch.
Sweep out the belt.
Bend the free cut of the belt towards the front side of the lower part of the apron, iron the stitching seam towards the bib.
Bend the free edge of the belt 1 cm inward, baste and stitch the belt 1-2 mm from the folded edge.
Remove running stitches and perform WTO.
Product cost.
Name
Consumption of materials
Cotton
Floss threads
The cost of the apron for culinary work was 91 rubles. 00 kop. The cost of the product does not include the cost of tailoring, since the apron was made independently. Therefore, design work is economically feasible and brings savings to the family budget.
Quality control .
The apron produces a positive emotional effect, is made taking into account fashion and design trends, is reliable and easy to use. The project was of average complexity; I did not experience any difficulties during its implementation and I think I did an excellent job. I received satisfaction from my work.
Conclusion
It was not difficult for us to complete the project work - sewing an apron and writing a project, since the knowledge that I received while sewing an apron in class, the recommendations of the technology teacher and additional literature on this problem helped me with this.
General view of the apron: an apron with a bib, the lower part has right angles, and pockets are conveniently located on it. I liked the made apron. We believe that all seams are made correctly and accurately.
In the process of completing the project work, I completed the tasks set for myself:
learned what an apron is;
found out when aprons appeared and what they were like before;
researched fabrics for sewing an apron;
described the process of making an apron, drawing up a technological map, which included a sequence of manufacturing the product that was more convenient for me;
We sewed a neat and convenient apron for working in the kitchen.
Now we also have an apron, and we will be able to help mom in the kitchen, because we are future housewives!
I liked sewing an apron because it is a very interesting activity. In the future, I really want to sew a more complex thing, but for this I will need to acquire the necessary skills and knowledge that we will acquire at school during technology lessons. If you continue to engage in business, then if all the requirements for the quality of the finished product are met, you can get a competitive product.
Application.
Model No. 1

Model No. 2

Model No. 3

Model No. 4

Model No. 5

Literature
1 Illustrated explanatory dictionary of the Russian language. / V.I.Dal. – M.:
Eksmo, 2006. – 896 pp.: ill.
2 Makhmutova H.I. We design, model, sew. Book for students. –
M.: Education, 1994.
3. Technology: textbook for 5th grade students. comprehensive school./ Ed. V.D. Simonenko.- M.: “Ventana-Graf”, 1998 - 256 p.
4. Chernyakova V.N. Fabric processing technology: Textbook. for 5th grade. general education institutions. - M.: Education, 1997 - 160 p.
Text available at ; In some cases, additional conditions may apply. See more details. .
Wikipedia® is a registered trademark of a non-profit organization
Minchenko Anastasia Sergeevna
Development of an apron on the belt.
Download:
Preview:
MBOU "Mishkovskaya Secondary School"
By technology
On the topic of:
" Apron"
Completed by a 5th grade student:
Minchenko A.S.
Checked by the technology teacher:
Minchenko N. I.
2015
Objective of the project
- Assess your capabilities in project activities.
- Develop and implement the project.
- Make an apron according to the project.
- Evaluate the work done.
Project sequence
- Justify the problem and need.
- Select model. Describe her appearance.
- Choose fabric.
- Determine the necessary tools, fixtures and equipment.
- Perform product design and modeling.
- Cut the product.
- Draw up a technological sequence for manufacturing the product and manufacture it.
- Evaluate the work done.
- Protect the project.
Rationale
At school, during technology class, I have to sew an apron. I chose an apron model made of printed cotton fabric with a pattern on a red background. Two pockets and the lower edge of the apron are trimmed with red lace to match the apron.
Ponder star

Figure measurement
Materials and tools: measuring tape, textbook, workbook.
Work execution technology
- Choose an apron model (one - on a belt, the other - with a bib).
- Draw the selected apron model in your workbook.
- Fill out the table in your workbook, writing down the measurements that will be useful to me when constructing the apron design.
Subsequence | Designation Merok | Name Merok | results Measurements |
Di | Length of the product | ||
St | Half waist | 33,5 |
|
Sat | Half hip circumference | 44,5 |
Equipment selection,
Tools and accessories
- Sewing machine.
- Ironing board, iron.
- Cotton threads№ 40 – for sewing and handicrafts.
- Manual needle no. 3, pins, scissors, thimble.
- Measuring tape, ruler, chalk.
- Textbook, workbook.
Additional materials:paper for making patterns.
Work execution technology
Construction of a drawing of an apron on a belt
Name of segments | Calculation | Construction |
1.Determination of the waist line | Construct a right angle from point T |
|
2. Determination of the hemline | Di = 40 cm | From point T downwards, set aside the measurement value Di and place point H |
3.Determining the width of the apron | Sat: 2 + 6 = 28 cm | From points T and N live to the left received - and put points T1 and H1. Connect the points with a straight line. Build a square. |
4.Pocket location | Constant | From point T, put 6 cm down and put point K. From point K, put 14 cm down and put point K 1 . From points K and K 1 set aside 10 cm to the left, draw straight lines and place points K 2 and K 3. Connect the dots with a line. |
5.Determining the width of the belt | 9 cm | From point P set aside the width of the belt 9 cm. Place point P 1 . |
6.Determining the length of the belt | St * 2 + 20 = 33 * 2 + 20 = 86 cm | From point P 1 set aside the length of the belt 86 cm and build a rectangle. |
Model selection
Model description
I chose an apron model made of printed cotton fabric with a pattern on a red background. Two pockets and the lower edge of the apron are trimmed with red lace to match the apron.
Modeling
I chose model No. 4
Designing an apron
Materials, tools and accessories:ruler, square, pencil, eraser, measuring tape, pattern paper, textbook, workbook.
P P 1
T 1 T
KK K 2 K
K 3 K 1
H 1 H 2
P 2 P 3
Manufacturing technology
Apron on the belt
Preparing fabric for cutting
- Identify fabric defects with the help of a teacher.
- Determine the front and back sides of the fabric.
- Determine the direction of the grain thread in the fabric.
- Iron the fabric.
« 2
Details of the cut of the apron on the belt:
1 – lower part of the apron, one part with a fold;
2 – belt, two parts;
Direction of the filament thread.
Technological sequence for making an apron on a belt
1. I will prepare the cut details for basting.
2. I'll finish the patch pocket.
3 . I will connect the pocket to the main part of the apron.
4 . I will process the bottom and side sections of the apron.
5 . I will process the top cut of the apron (assembly).
6. I'll work on the belt.
7 . I will finish the top edge of the apron with a stitched belt.
Safety
- Safety precautions during labor lessons when working with hand tools
- Scissors, needles and awls must be stored in specially designated places and taken out only for their intended use;
- Before work, you need to check for rusty needles and pins. It is forbidden to use them to complete tasks, as they do not pierce fabric well and can break and injure your hand;
- Used tools must be put back in their place; scissors must not be left open. If they need to be handed over to someone, then they must be closed and directed with the handle towards the recipient;
- It is forbidden to hold scissors with the sharp parts facing upwards, or to use them with a weakened central fastening;
- When using scissors, insert your thumb and middle finger into the rings and hold them on the underside with your index finger. The narrow blade should be at the bottom, and the tip should be directed away from you. You can't cut on the go;
- You need to sew the fabric using a thimble;
- To fasten the fabric, you need to stick pins into it only with the sharp ends facing away from you;
- Do not bite the threads with your teeth or tear them, and also stick loose pins into clothing or any objects not intended for this purpose; you must use special pads;
- When working with knitting needles, you need to keep them no closer than 35 centimeters from your eyes. Do not use bent or rusty knitting needles;
- Broken needles and pins must be handed over to the labor teacher.
- Safety rules during a labor lesson when working with a sewing machine
- Tuck long hair under a cap or scarf, and fasten the sleeve cuffs;
- It is necessary to make sure that the sewing machine is working, that there are no visible damages and that there is an intact ground. Check the strength of the needle and foot fastenings, as well as the presence of a dielectric mat under your feet;
- Before sewing, you must remove all foreign objects from the sewing machine platform;
- Before sewing the product, make sure that there are no needles or pins left in it;
- When sewing, do not lean close to the sewing machine, ensure correct posture, and do not keep your fingers dangerously close to the working needle. Stitch dense areas using reduced speed;
- When you finish the task, unplug the sewing machine from the power source.
- When working with a sewing machine equipped with a manual drive, points regarding the power supply of the equipment are removed from the safety instructions.
- Instructions for following safety rules during a labor lesson when working with an electric iron
- Tuck long hair under a cap or scarf;
- Make sure that the cord and plug are in good condition, that there is grounding and a dielectric mat under your feet, as well as a heat-resistant stand under the iron.
- Before starting work, if this is provided in the classroom, you must turn on the exhaust ventilation;
- You must touch the electrical cord, switch and twirl only with dry hands;
- It is necessary to choose the correct thermal ironing mode on the iron;
- Do not leave a hot iron unattended and ensure that its sole does not touch wires or foreign objects;
- When ironing, stand with your feet on a dielectric mat. Do not touch the hot surfaces of the iron with your hand and do not wet the ironed fabric with water;
- At the end of the task in the labor lesson, you must disconnect the iron from the power supply and place it on a heat-resistant stand.
- Each student is required to follow safety rules during labor lessons to avoid injury and fire. The teacher must monitor compliance with safety regulations during the labor lesson and promptly eliminate possible risks.
Calculation of the cost of an apron
Red lace
Cotton red thread
10 (1 skein)
The cost of the apron is 30.4 rubles.
So that clothes don't get dirty,
And less often to wash,
I advise you in the kitchen
Wear an apron on top.
Maintains a neat appearance
Saves a lot of effort
He introduces you as the hostess.
Just an apron. Really nice?
The company "Clothes for home" has released a NEW apron model!
Evaluation of the work done
To evaluate the work done, I answered the following questions for myself.
- How difficult was it for me to work, what interfered with my work and what helped?
- Was the work done with high quality, that is, was the processing of the apron done correctly (were the machine stitches straight and even along the entire length; were all temporary stitches removed; were the widths of the pocket and waistband the same along the entire length; was the product ironed well)?
- Did I enjoy doing the creative project and why?
- Do I want to design and sew a more complex product?
Project protection
I will repeat all of the above at the project defense, present a creative project, pattern drawings and the finished product. The teacher and a jury of classmates will ask me questions about the design of the project and the manufacture of the apron, and express their opinion on the appearance and quality of the product.
Page
- Project goal………………………………………………………………………………….3
- Rationale………………………………………………………………………………….4
- Ponder star……………………………………………………………….4
- Figure measurement………………………………………………………………………………………..5
- Selection of equipment, tools and devices………….5
- Construction of a drawing of an apron on a belt………………………………………………………..6
- Model selection……………………………………………………………………………….7
- Modeling……………………………………………………………………………………….8
- Design of the apron…………………………………………………………….9
- Technology for making an apron on a belt………………………………..10
- Occupational safety……………………………………………………………………………….11-12
- Calculation of the cost of the apron……………………………………………………13
- Advertising brochure……………………………………………………………………………….14
- Evaluation of the work done………………………………………………………..15
- Project protection………………………………………………………………………………15
Creative project. Apron. Students of MBOU Secondary School No. 14 With. Krivenkovskoe Muratova Victoria Technology teacher: Madikova T.V. 2015

Objective of the project
- Design and make an apron for yourself for working in the kitchen.
tasks:
- Assess your capabilities in the field of project activities;
- Develop and implement the project;
- Make an apron;
- Evaluate the work done.
- Protect the project.

1. Justification of the problem and needs that have arisen.
For working in the kitchen and helping mom at home, so as not to get dirty
We sewed an apron during technology lessons.


Modeling and design of an apron
I cut the apron taking into account the front and back sides of the fabric, the direction of the grain thread, seam allowances and the economical arrangement of the cutting details on the fabric.
Preparing cut details for basting.
1. Place copy stitches along the side and hem lines of the apron bottom.
2. Transfer the pocket location to the other side of the apron bottom piece using copy stitches.
3. Remove the pins. Move the parts apart so that the threads of the stitches are stretched, cut them in the middle between the two sections of the parts.
4. Mark the middle of the bottom of the apron on the wrong side of the piece with a chalk line.
5. Continue with straight running stitches the line of the middle part of the lower part of the apron. Stitch length is 1.5-2.0 cm.
6. Place copy stitches along the side line, hem line of the bottom of the pocket and along the fold line of the top allowance.
7. Pull the pocket piece apart so that the stitch threads are stretched, and cut them in the middle between the two sections of the piece.
8. On the wrong side of the pocket, mark a line around the middle of the pocket with chalk and place straight running stitches along it. Stitch length 1.0-1.5 cm.
Processing a patch pocket.
1. Fold the allowance for finishing the top edge of the pocket along the marked line to the front side.
2. Fold the inside edge of the seam allowance 1 cm and press.
3. Baste and stitch the corners of the pocket to the amount of allowance on the sides of the pocket.
4. Remove the basting stitch threads, turn the processed seam allowance of the top edge of the pocket to the wrong side, and straighten the corners of the pocket with a peg.
5. Baste and stitch the folded edge of the pocket at a distance of 0.2 cm from the edge.
6. Remove the basting stitch threads and iron the top edge of the pocket.
7. Sweep the side and bottom cuts along the marked lines.
8. Iron the pocket from the wrong side.
Connection between pocket and apron.
1. Place the processed pocket on the bottom of the apron along the laid copy lines, aligning the line of the middle of the apron with the line of the middle of the pocket. Pin the pocket.
2. Baste the pocket and remove the pins.
3. Sew a pocket on the bottom of the apron with a finishing stitch at a distance of 0.2 cm from the edge. At the beginning and at the end, use machine tacks with a finishing stitch.
4. Remove the basting thread and iron the pocket.
Processing the bottom and side edges of the apron with a closed hem seam.
1. Fold the bottom edge of the apron to the wrong side by 0.5 cm and sweep it. Fold the bottom edge of the apron a second time along the unmarked hem line of the bottom and baste.
2. Apply a machine finishing stitch 0.2 cm from the folded edge. Remove the note stitch threads. Iron.
3. Trim off the protruding seam allowances at the corners.
4. Fold the side sections of the apron a second time along the intended line and sweep, carefully tucking in the seam allowances in the corners.
5. Continue machine stitching 0.2 cm from the folded edges of the bottom of the apron. Remove the note stitch threads. Iron.
Product manufacturing sequence

Costs for making an apron:
Calico fabric meter -100 rub.
Sewing machine needles-20r.
Braid meter - 50 rub.
Floss - 15 rub.
Total: 185 rubles.
The cost of the apron for culinary work was 185 rubles.
The cost of the product does not include the cost of tailoring, since the apron
was made by me myself.
Therefore, the design work is economically feasible
and brings savings to the family budget .
Self-esteem (total)
I learned how to sew an apron during craft classes, and made a creative project at home.
I think I can give myself a high five based on the quality of the backsplash and the scope of the creative project.
Self-esteem: 5.

Used Books:
- Technology. Service work. 5 grades O.A. Kozhina and others.
- Fashion magazines

Select model. Write a description of the model's appearance. Choose fabric. Select the necessary tools, fixtures and equipment. Perform product design and modeling. Cut the product. Draw up a technological sequence for manufacturing the product. Calculate the cost of the product. Evaluate the work done. Protect the project


10 people were interviewed. A study of consumer demand showed: an apron is necessary in a woman’s wardrobe; the majority of respondents like aprons; they can be of different colors, made of cotton fabric with pockets and lace trim, medium length, not expensive and very comfortable.

Based on the models reviewed and the results of a sociological survey, I decided to choose model 4. Firstly, I liked this apron more than all the models reviewed. I liked it because it will be sewn with a large pocket. I need a large pocket because I like to put all my essentials in my pockets. Secondly, I will decorate the apron with lace, and it will have a very elegant look in which you can receive guests. Thirdly, I will sew it with a one-piece bib, so it will be comfortable.

Based on the results of the compiled design specification, the main criteria for making an apron are the following: the apron should be medium in size with a one-piece bib and large pockets, finished with lace and bias tape. The product must be safe to use, comfortable to wear, hygienic and environmentally friendly, and also inexpensive.


Aprons can be sewn from various fabrics: linen, silk, cotton. Linen fabrics have a smooth, shiny surface, are distinguished by great strength and low elongation. They easily absorb moisture and wash well. Their disadvantage is that they wrinkle quickly, but they also smooth out just as quickly. These fabrics feel hard to the touch. Silk fabrics are soft and smooth to the touch, have a pleasant shine, are hygroscopic and breathable, but they stretch greatly, crumble, and have significant shrinkage. It is very difficult to sew from such fabrics without skills and experience. Cotton fabrics have significant strength and hygroscopicity, quickly get wet and dry. They are comfortable to wear and hold up well to washing and ironing. To make an apron, my grandmother offered me fabric from her chest. She gave me three pieces of fabric.

Fabric 1 – silk. I refused it because it stretches a lot and crumbles a lot. But I liked the drawing. Fabric 2 – crepe de Chine. I didn’t like it for the same reason that it crumbles, but the main reason is that the color is very dark. Fabric 3. This is cotton fabric - sateen. The fabric is thick, shiny, and has bright, elegant colors. To make the apron, I chose cotton fabric (satin), since it has significant strength and hygroscopicity, gets wet and dries quickly, is comfortable to wear, washes and irons well. It is also a very beautiful color.


The lace my grandmother had didn’t suit me, so I went to the “Sew It Yourself” store in Kirov. The seller offered me several options. But I liked the yellow lace at first sight. The price of 13 rubles per meter suited me, and I bought 4 meters. I also bought 2 m of bias tape.


Electrically driven sewing machine. Ironing board, iron. Cotton threads 50 - for machine work, 60 - for hand work. Hand needle 3, pins, scissors, thimble. Measuring tape, ruler, chalk. Textbook, workbook. Additional materials: paper for making patterns, fashion magazines.


Preparing the fabric for cutting Laying out patterns on the fabric and cutting Preparing the cut details for processing, laying copy stitches Processing the bottom and side cuts with an open hem seam Processing the straps with an overcast seam Processing the belt Connecting the belt and pocket to the main part of the apron with an overcast seam Finishing the apron


From an environmental point of view, the manufacturing process and operation of my product will not entail changes in the environment or disruptions in human life, since my apron is made from environmentally friendly materials, and I will not throw away the remaining fabric, but will sew a small potholder from scraps. The process of sewing an apron is an environmentally friendly production!


In the process of completing the project work, I solved the following tasks: I studied the necessary literature for developing the project and making the apron. I carried out the necessary research, which was useful to me in the process of developing the project. I sewed a neat, elegant and comfortable apron for receiving guests and culinary work. I am satisfied, the project was a success. Working on this project allowed me to deepen my knowledge of technology


Articles on the topic