Make a copy roller for sewing with your own hands. Types and uses of copy wheels
The toothed wheel is the most commonly used copy wheel. Used with copy paper. When drawing on carbon paper, dotted lines remain on the details of the cut. With the help of a wheel and carbon paper, it is convenient to transfer tucks, sewing lines for decorative elements, and mark the location of the loops.
Wheel without teeth

The smooth wheel is used, like the first option, to transfer lines. But in this case, the line is one solid. It is convenient for them to work on dense coat fabrics.
Double wheel

It is used to outline the entire part, while immediately marking the seam allowance. The design of the wheels allows you to change the width between them. It is especially convenient to use such a tool when the pattern is already given with allowances and when transferred to the fabric, only the outer contour of the cut is outlined and the seam lines are not visible. In this case, seam lines can be applied using the double wheel.
How to use wheels

Place the pattern pieces on the fabric and pin them together. Place a piece of carbon paper between the fabric and the pattern so that the ink layer is on the fabric (in this case, facing down).
Draw the wheel along the lines you want to transfer to the fabric. If the lines are hard to see, you can drag the wheel again increasing the pressure.

If you are cutting two symmetrical parts at once on a fabric folded in half, then using the wheel you can transfer the allowance lines and other marks. To do this, copy paper must be placed under the folded fabric with the ink layer up.
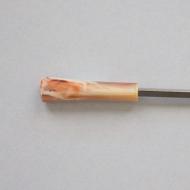
Since time immemorial, chalk has been used by tailors to mark when cutting or trying on products. I advise you to take ordinary school chalk without any admixture of wax, because wax will leave indelible stains on modern fabrics that have undergone special processing. However, even ordinary chalk hardens during operation and becomes unusable. To prevent this from happening, insert a piece of chalk into a special holder. On the cover of the holder there is a ledge for sharpening the chalk.
Special tailor's crayons available in the form of small rectangles of white, blue or red.
copy roller
 This wonderful instrument has been known for a long time, but until recently it was undeservedly forgotten. copy roller allows you to easily and accurately trace the contours of patterns on the fabric.
Its former variety had sharp edges that damaged the fabric. The new tool is designed so that it does not damage even the most delicate fabrics and at the same time allows you to very accurately apply marks through large sheets of special carbon paper.
Of course, carbon paper, especially dark colors, must be handled with care, otherwise indelible stains will remain on the fabric. Therefore, it is better to use white paper, and take dark paper only in cases where other colors are not noticeable. Carbon paper is always applied from the wrong side of the fabric.
Transferring a pattern to fabric, especially when sewing clothes, often means transferring chalk lines from one symmetrical piece to another. But the same may be needed when sewing toys.
There are several ways to copy chalk lines. For example, using copy stitches. Or pins. But I prefer one, the simplest and most accurate, in my opinion - transferring the markup from one part to another with a copy roller on a chalkboard or using special carbon paper.
The essence of this method is as follows:
1. When cutting paired symmetrical parts, the fabric is folded into 2 layers with the front side inward.
A pattern is laid and pierced from above and all the contours are outlined. About what you can use to trace the contours of patterns on fabric, I talked about in the review “How to transfer patterns to fabric?”
As a rule, all chalking is done on the wrong side of the right part.
2. Then the parts are cut out, taking into account the necessary allowances for the seams.
Because the chalking is applied to the wrong side of the right part, then on the side of the board or carbon paper covered with a layer of chalk, the left part is applied with the wrong side down.
4. Then pass the copy roller along the chalk lines marked on the right part.
When copying marking lines on a symmetrical part, the copier wheel must pass exactly in the middle of the chalk line. Otherwise, distortion of the symmetrical part may occur.
As a result, prints are obtained on the left part in the form of a line consisting of points close to each other.
5. After that, the pins are removed and, if necessary, the transferred lines are refined using a ruler and a pattern.
It is important to note that the quality of the copy line depends on the copy roller and the pressing force. And, then, it's time to talk about what copiers are.
Types of copy rollers
You can find several names for the copy roller - copier, copy wheel, and even a cutter. But the name "cutter" is consonant with the word "cut". And we are not going to cut them yet. Therefore, we will not use this name, so as not to mislead anyone.
Copy wheels are available with serrated and smooth edges. 
If the copier has very blunt teeth or you press the chisel very hard, the line will be thick and blurry. And very sharp or damaged (bent, burred) teeth can damage delicate fabric.
Also, the choice of copier depends on the pattern on the fabric. So, on a fabric with small polka dots or with a very colorful small pattern, the line left by a jagged copier may simply not be visible.
But the copier itself cannot transfer marking lines to a symmetrical part. It "works" only in tandem with carbon paper or chalkboard. 
To be honest, I've never used carbon paper. Although no, there were several times when I studied machine embroidery. And therefore, I can’t say for sure whether there is a fundamental difference in stationery carbon paper and carbon paper for fabric. I dare to assume that the difference is only in size.
If you use carbon paper when translating marking lines, please share which one you use. I myself am very interested.
But if, nevertheless, a stationery carbon paper is not suitable, and it is expensive to buy a specialized carbon paper, I want to please you! You can make a very convenient analogue with your own hands - a chalk board.
And I have prepared detailed instructions for making a chalkboard to help you. Share this article with your friends by simply clicking on any social button and download the instructions.
So that the wrong side of the left part is not soiled with chalk or a copy coating of paper, you need to avoid pressing the parts with your hands (palms, elbows), do not lean on the part located on the chalk board. Otherwise, any pressure will be imprinted on the lower part.
And with the help of this method, you can transfer the pattern of a large appliqué onto fabric. But the drawing of the application from small details is difficult to translate with a copy wheel - jewelry work.
To translate an appliqué (or embroidery) design, place the base fabric right side up on a chalkboard. From above, on the wrong side of the base, put a tracing paper with a pattern. Just do not forget to turn the tracing paper face down, otherwise the image will turn out in a mirror image. Fix the tracing paper with pins and circle the contours with a wheel.
This is how I translated the appliqué pattern onto my graduation dresses. Very comfortably!
And in conclusion, I suggest you watch an excellent video clip on using a copier to translate patterns.
As I already wrote, this method is very easy to use and quite accurate. If you want to use it, you will need to purchase a copy wheel and fabric transfer paper or make a chalkboard.
There are a lot of sewing tools and accessories. Some facilitate the manual work of a seamstress, others increase the capabilities of a sewing machine. For example, a marking tool will allow you to accurately transfer the pattern to the fabric, and a special foot with a "wheel" will make it possible to sew high-quality leather clothes on a household sewing machine. Special tailor's scissors and a transparent template ruler are simply an indispensable tool for a cutter and just like others sewing tools will make your work more qualitative and professional.

Convenient and reliable sewing machine - a faithful assistant for many years. The sewing machine does not have to be the "latest" model. Even the most ordinary machine that performs a straight and zigzag line in skillful hands is capable of much.
If you intend to occasionally sew only for yourself and your family, you do not need to purchase an expensive sewing machine with many stitches and operations. Many of them are unlikely to ever be needed. Moreover, almost any clothes can be repaired and sewn on an old manual sewing machine such as Podolsk.
But if you decide to engage in tailoring "seriously and for a long time", especially to order, then, of course, you need to purchase a modern sewing machine that is affordable for your financial capabilities. But never forget that your success depends on skill and how well you know how to use the machine, and not on how much it costs or how many types of decorative seams it can perform.
Carefully study the instruction manual and try to use all its features, take the time to understand how to use all of its accessories and options.
Keep your sewing machine clean and lubricated to keep it running smoothly. The shuttle mechanism especially needs cleaning and lubrication. Remove the needle plate from time to time and use a brush to clean the cloth feed dog and hook from dust and fibers. A well-oiled machine runs almost silently.

Success or failure in tailoring sometimes depends on the selection of a sewing machine needle. The type of needle and its thickness must match the fabric, thread. The thinner the fabric, the smaller the needle number should be. The thinnest needles (No. 65) are used for sewing very fine silk and cotton fabrics. Products from dress and suit fabrics are sewn with needles No. 90, from dense and coarse fabrics (denim) - No. 100-110.
With constant work, the tip of the needle experiences very large loads and sometimes becomes dull. When hitting the needle plate, the tip of the point is bent, which leads to a skipped stitch and thread breakage, and puffs may appear on the fabric. The condition of the needle point must be constantly monitored and blunt needles should be replaced immediately.
Needles come in four (basic) types:
Universal needles- for a variety of materials. Sizes (numbers) from 9/65 (the thinnest) to 18/110;
Needles with a rounded end- for knitwear and tensile materials. Sizes from 9/65 to 16/100;
double needles- to perform a decorative stitch (such a needle gives two parallel stitches on the front side of the product, and a zigzag is formed on the wrong side);
Leather sewing needles have a special shape of the tip in the form of a flat blade. They are used for working with leather, sewing products from genuine leather or vinyl.
Ball point needles There are a number of other special needles for fabrics that stretch both in the transverse and in the lobar direction. Their point has the shape of a ball, which allows you to sew a product from thick knitwear and elastic materials such as stretch without gaps.
Denim needles have a very thin point and are designed for thick cotton fabric, canvas and other heavy fabrics.
Basting needles have two ears, located one above the other. Threading the top eye of the needle will create gaps in the stitching. In this way, you can get a running and even decorative finishing stitch. If the thread is threaded into the lower eyelet, you get a regular machine stitch.

If you want the product to look professional, then you will need to buy overlock. Overlockers are divided into industrial and household.
A household overlock differs from an industrial overlock with a lower engine power and a lower speed. However, for a household overlock, manufacturers provide many additional features. On it, you can overcast fabrics of various quality and thickness, use any thread, including from ordinary small spools. Household overlockers are produced by such well-known companies as Singer, Juki, Elna, etc. They can be three-thread and four-thread, and some models can be easily converted to two-thread ones.
Tools and accessories for hand sewing

They are selected depending on the type of handicraft.
For basting fabrics, it is convenient to use "hat needles", long needles with a round eye. With such a needle it is convenient to lay a line for the formation of assemblies.
Needles with a rounded point are used to connect knitted fabrics. Such a needle gently pushes the loops apart and slips between them without piercing or tearing the fibers of the fabric.
Short sewing needles with a round eye are used for making small stitches on thick fabrics or for quilting.
Wedge-shaped needles (triangular in section) are used when working with leather.
Another important sewing tool is pins. They are used for cutting off cut details during sewing and facilitate and speed up work. Tailor's pins come in different lengths, thicknesses, and have heads of different shapes and sizes.
Thimble Protects your finger from needle pricks while sewing by hand. The thimble should be freely put on the finger, without squeezing it, but at the same time not slipping off. Learn to use it by pressing on the needle with the side of the thimble, not the bottom. The habit of working with a thimble is developed quite quickly, it is enough to put it on and vilify it for a whole day, without removing it when doing any other household work. In the end, you will no longer feel it on your finger as a foreign object that interferes with you.

Sewing tool like needle threader is a "loop" of very thin steel wire, fixed in a flat plate. It is used to thread the needle through the eye of a needle. This device helps not only to quickly and without hassle to thread a sewing or machine needle, but also when you need to bring the thread to the wrong side of the product or eliminate puffs on the fabric.
Wax box for waxing threads is necessary for a variety of manual sewing work. After waxing, the thread does not get tangled and does not get pulled into loops. In the lid of such a box there are special slots through which the thread passes.
Sewing marking tools

There are also special tools and devices for applying contour lines of patterns and other marks to the fabric.
Cutter (copy roller)- a wheel with a serrated edge on the handle, used for marking fabrics. The jagged edge of the wheel leaves a dotted line behind it. A wheel with a smooth edge (without teeth) is used for marking very thin airy fabrics. Such a roller leaves a continuous line. The double copy roller allows you to outline the line of the line and the allowance at the same time. Its width can be adjusted, which allows you to mark the cells and stripes.
Copy paper necessary for transferring cut lines to the fabric with a copy roller (cutter). You can use paper that matches the fabric, as long as the color of the lines does not blend into the background. You can use white transfer paper so that the lines are clearly visible. There are grades of carbon paper that leave a mark that can be washed off with water. Working with carbon paper is acceptable only if the presence of marks on the inside of the product does not matter to you.

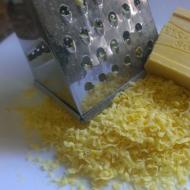
allows you to apply clear lines on the fabric. The disadvantage of this tool is that traces of chalk must be removed after sewing the product, sometimes this is not easy to do. Instead of chalk, you can use a flat piece of high quality soap (predominantly white). The remnant can be further sharpened with a knife and with its help apply thin, clear lines to the fabric that disappear when ironing the product. To avoid unpleasant surprises, try the soap on a piece of fabric to see if it leaves stains on this fabric after ironing.
Also used for marking fabric. special markers. There are some inks that evaporate and disappear from the fabric 48 hours after the label is applied, but most often they have to be removed with water. In all cases, the marks made with the felt pen must be removed before you start ironing the area, otherwise the iron may set them on the fabric. In addition, before marking with a felt-tip pen on the main fabric, you should make sure that the felt-tip pen does not leave a mark on this fabric and that the water when removing the markings also does not leave stains.
Measuring tools

Tools and accessories for cutting fabric

With shaped handles specially designed for cutting fabric, they are used not only by professional tailors. The angle of the blades allows you to cut the fabric without lifting it off the table. Handles of different sizes also have their own purpose. The large ring allows you to stick four fingers at once. It is desirable to select scissors according to the size of the hand. If you are left-handed, try to get left-handed scissors. The length of the blades can be different - from 18 to 30 cm. Such scissors must cut through eight layers of fabric up to the very tip of the point.
Serrated scissors("zigzag") make a jagged cut on the fabric. With such scissors on some fabrics, trims and allowances are cut so that they do not crumble. High-quality cutting tools are not cheap, but if handled with care and care, they will last a lifetime. It is necessary to protect them from falling, do not cut paper, foil, wire with them. Your scissors should always be well sharpened. Working with blunt scissors is difficult, and besides, it can damage the fabric.
The cutting table must have a smooth, solid surface and a height of about 90 cm. The cardboard cutting board protects the surface of a regular table from damage. On such a board, the fabric slips less. It is convenient to store when folded. It provides the necessary elasticity when working with a cutter.
Iron and ironing accessories

Should have a large amplitude of temperature control. It is desirable to carry out wet-heat treatment of the fabric with an iron that has a reliable thermostat. For working with synthetic materials, it is important to have an iron that produces steam under all conditions, and not just at high heating temperatures. The non-metallic sole allows you to iron fabrics on the front side without the formation of las and singed areas.

A special plate is installed on the soleplate of the iron. It is used to iron the front side of the fabric, even the pile, without the formation of las and singed areas. Fusible fabrics do not stick to it. The use of a removable soleplate will modernize and extend the life of the old iron.
Ironing board and a special stand (block). The ironing board should be upholstered on top with a soft material, but at the same time be hard enough. In addition, it is desirable to have a desktop ironing stand. It is convenient in that it allows you to iron part of the product, while the rest of it lies on the table, and does not hang from the ironing board and is not deformed during the ironing process.

It's good to have a few pad for ironing used in hard-to-reach places and special ironing pads. Read more in the article How to iron clothes properly.
An oval-shaped pillow is very convenient in work, covered on one side with cotton, and on the other side with woolen fabric. It is convenient to iron small hard-to-reach areas with a small pad with two sharp ends. There are other tools and accessories for sewing, and new ones are constantly appearing, which can be purchased in specialized stores.
Related Articles