Cake shu. Shu cake with curd cream
Homemade cakes - recipes
Shu cake is a delicate and airy dessert with butter cream. Use the step-by-step recipe with photos and videos and try making your own Shu cake!
1 hour
285 kcal
5/5 (11)
Confectionery stores sell various desserts - fragrant buns and cookies. They are always beautifully decorated and look very appetizing. But we don’t know how or what they are made from. More and more often, strange chemical terms are found in the composition of confectionery products. And we really want natural, homemade baked goods. That's why today I present the recipe for Shu's custard cake.
Children absolutely love it, and if you want to reward your little one, bake this dessert. But not only children love this cake. It is ideal for a romantic evening. This will be a great addition to champagne with strawberries. In addition, this is a very fashionable and modern dessert. And although it looks complicated, I’ll try to dissuade you - the manufacturing technology is simple and understandable. If you follow all the instructions correctly, everything will work out for you!
Shu cake is made from choux pastry and craquelin. It is the craquelin that turns into a crispy crust during the baking process. Ideally, the finished cakes are empty inside. This void is filled with cream.
Kitchen appliances: a mixer to beat the dough and filling, a bowl for making craquelin and a saucepan for choux pastry, a rolling pin, parchment paper and a baking sheet.
Ingredients
For the choux pastry:
For craquelin:
For cream:
How to choose ingredients
For the French Shu cake, you need the simplest ingredients and nothing exotic. Let's start in order. Eggs should be medium-sized chicken eggs. Regular butter, butter. We take drinking water, not mineral water. We use white wheat flour. It should only be of the highest grade or “extra”. We add only heavy cream (33%). If you find it difficult to buy cream cheese, use only cream and powder. The cream will be no less tasty.
Cooking sequence
First stage (craquelin)

Second stage (choux pastry)

Third stage

Fourth stage
Now let's prepare the cream for Shu cakes.

Now you can enjoy a wonderful dessert. 
Decorate and serve delicious dessert
This cake itself is very beautiful. And if you used bright dyes for craquelin, then there is no need for unnecessary details. The best decoration would be a cut off bright top of the cake on a creamy pillow.
You can also decorate the cake with strawberries or small strawberries. If you use large berries, then they must be carefully cut and placed on the cream. You can also hide strawberries inside the cake by filling them with cream.

So, consider this the beginning of a big direction in our training. Together we will learn how to make interesting and very beautiful desserts that will be the envy of many coffee shops and pastry shops. Since this is a more advanced level (both regarding the cooking processes and externally), I want you to follow the steps and recommendations exactly, and I will tell you everything in detail and clearly. I recommend now for future recipes to stock up on good scales, a thermometer and ingredients like dyes, and so on. I have something in , something in your cities.
Choux pastry is a type of dough that gets its name from the method of preparation. When preparing choux pastry, flour is combined with boiling water and fat and boiled or steamed for up to several hours. ThisThe dough is prepared without sugar, has a fresh taste and has a variety of uses. This dough is prepared without any leavening agents.A feature of choux pastry made from wheat flour is the presence of large voids inside the products, which are filled with cream or other filling.
These cakes were filled with whatever they wanted. Even on my blog you can get recipes for creams: , on and , or on . And that's just the minimum. When the French had enough of these custard pies, they decided to go further and do something new. Then they added craquelin (shortbread) dough. This is how today’s fashionable Shu with craquelin, cake balls, with a beautiful crust, appeared.
Let's start with the second test, since it needs time in the freezer.
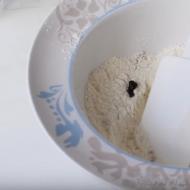
Sift flour (100 g) into a bowl. We take the simplest wheat, without additives or raising agents. If you want to tint the crust a chocolate color, replace 20 grams of flour with the same amount of good cocoa. 
Next is sugar (100 g). You can take a simple one, you can take a reed one, you can combine it. 
Chop cold butter (80 g) into small cubes. I store the butter in the refrigerator; when you take it out, it should be completely solid (this, by the way, is one of the ways to understand whether the butter is of high quality). I want you to understand that the less you touch the butter with your hands, the less it melts. The secret of good shortcrust pastry is just cold butter into which we rub sugar and flour. Therefore, if while cutting, the butter has become soft, put it in the refrigerator for 10 minutes. Butter that has once melted sufficiently will not become the same when cooled in the refrigerator. Therefore, initially use oil here that has always been in the refrigerator and has not had time to become soft. 
If you make colored Shu, it is better to add the dye to the sugar and flour. I use (I’m not sure if it will be possible with dry ones, there is no moisture). Three drops were enough for me to paint. The color of the final cakes was exactly the same as the color of the dough, so we’re not wise. 
And now we throw in the butter cubes. 
And you begin to rub flour and sugar into the butter. I just pass the mass between my fingers, over and over again. 
As a result, you will end up with a lump that looks like crumbly plasticine. Let me remind you once again the importance of using scales. Roll it into a ball. And place between sheets of parchment. 
Roll out the layer to a thickness of 2-3 mm. I made it thicker so you can see everything better. But for beautiful cakes, 2-3 mm is just right. We put this layer in the freezer. 
I want to rest, but there’s no time. Let's work on the second type of dough, choux. In general, I gave a detailed one, but I’ll write here with more recent photos.
With him, it seems, everything is simpler. Cut butter (100 g) into large pieces, its temperature is not critical. Place in a saucepan with a thick bottom. Pour water (250 g) there, along with a teaspoon of salt and sugar, just for emphasis. Place on the stove and wait until the butter begins to melt. Help by stirring with a spatula. 
At this time, sift the flour (150 g). 
The oil quickly begins to dissolve in the heating water. 
Remove from heat and add all the flour at once, otherwise lumps may form. 
Stir well and put on fire. It is most convenient to work with a spatula, because the dough comes off easily. You can use silicone spatulas. The main thing is not the spoons. 
Keep it on the stove and constantly stir the dough, spreading it over the walls and bottom, and then collecting it into a ball. We warm it up this way. 
At some point it will roll into one ball. You still stir until such a velvety crust appears at the bottom of the saucepan. Not burnt, just a light coating. This means the dough is ready. Stir it for another minute or two to cool it a little, this will help the eggs not to curdle. 
We transfer our ball into the bowl. And we begin to add one egg at a time (they must be at room temperature, otherwise the dough will not bake well). In total you will need from 4 to 6. The thing is that the size of the eggs is slightly different and the ball of dough itself may contain a little more or a little less moisture. But I'll show you the texture you need.
First egg: 
Second: 
Third: 
Fourth: 
Break the fifth egg into a separate bowl and shake. Add half to the dough and mix. Here you may need half a fifth egg, perhaps a whole and part of a sixth. 
Now is the moment to catch. When you stir the dough with a spatula and lift it up, the dough will drip a little and not fall in pieces. But you can’t overdo it either. If in doubt, it's better to have it thicker. If it turns out that the dough has become too liquid, adding flour will not help. You need to make a new dough (thicker) and mix both. If the dough remains thick, but has already cooled down, adding an egg will also not help, so we do everything actively. 
Perhaps the video will help you understand the consistency a little:
I usually plant it from, with a round nozzle. I have a 12mm hole diameter. But if there is no nozzle, just carefully cut the nose of the bag to the same size. 
Traditionally, I place the bag with the nozzle in a tall glass, and turn the edges upside down. This is the most convenient way to transfer dough or cream, for example. 
We set the oven to 200 degrees, top-bottom mode, and begin to assemble our pies. 
So, put parchment on a baking sheet and pipe out circles with a diameter of 3 cm from the bag. Don’t put too much, because the dough will be baked, but will not have time to rise. If you have no experience, you can draw something round on parchment, then turn it over (so that the drawing does not touch the dough) and place it according to the marks. Leave about 4cm of space between the balls because they will expand. Pipe the dough while holding the bag vertically. Choose a ring exactly the same size as your blanks. Ideally, use this ring to draw on parchment. A little secret, if you have tails sticking up on your choux pastry, they can then greatly affect the surface (final) with cracks. It is better to smooth them with your finger, or initially try to wrap them with a bag. 
Now we take out our shortbread dough, or rather a tile) and cut out as many circles from it as there are choux pastries on the baking sheet. The dough is very hard because it is already quite frozen. 
Carefully place the resulting coins on the custard balls. 
We put it in the oven and wait. This takes approximately 10-12 minutes. But this is how I navigate - the bottom (where the choux pastry) begins to brown. At the same time, the balls will gradually begin to grow, and the top crust will crack. If you take it out too early, the cakes will fall off; it’s better to let them brown even more confidently. If it turns out that they made a batch, took it out and they still “deflated”, the next time, at the end, open the oven and let them sit there for 5 minutes (most likely, it’s cold in your kitchen and the temperature difference ruins everything). It is important that the top dough is cold (the coins are flat and do not curl at the edges).
Do not open the oven while Shu is cooking. 
Remove the finished Shu from the oven. Let cool on the baking sheet for about three minutes and then transfer to a wire rack. 
Proper custard cakes will be completely empty inside. 
And the outside will be crispy. 
There are two ways to fill Shu with cream. The first one is simple. Cut a small cross at the bottom with a knife, and add the cream there using a bag with a nozzle. 
The second one is beautiful. Cut off the cap with a saw knife. Cut the lid itself with a ring so that the edges are perfectly even and the lid is round. Fill Shu with cream and cover with a lid. In this option, you can use two types of cream. Custard on the bottom and whipped cream on top, for example. 
That's all. It is better to prepare them day after day, because the cream will gradually make the Shu dough soft and moist, and the crust will not be so crispy. You can freeze Shu and then fill it with cream if necessary.
As for the number of servings - I always have the same answer - it all depends on what diameter and how much you will pipet, how much dough will remain in the bag, bowl, and so on. But it makes about 20 pies with a crust.
They are stored for 10-12 hours. What happens next? The dough gets soggy from the cream. They remain just as tasty, but they no longer hold the geometry as well and are not crunchy. It is better to keep in the refrigerator in an open container. If you need them to stay in good shape longer, grease the inside of the cakes with melted chocolate (white, milk) or cocoa butter. It forms a film on the walls and the cream will not be absorbed into the dough.
Don't worry if it doesn't work out the first time. Although the recipe is simple, there are complications. Some get results 5-10 times. But then everything goes with a bang every time.
Only a true sweet tooth and connoisseur of delicate cakes can distinguish the noble “Shu” bun from the profiteroles and eclairs already familiar to everyone. In appearance, “Shu” is an ordinary cake, but after looking inside the delicate dough, tasting the airy cream and learning several interesting facts from the history of its origin, the sweet “Shu” pastry may receive the status of cake No. 1 among its custard relatives.
A “shu” bun is a small ball of choux pastry, almost hollow inside. During baking, the cake rises, air bubbles appear inside, due to this, voids are formed, into which the cream is poured. This interesting cake comes from France, and the first “shu” recipe was invented by the Frenchman Jean Avis at the end of the 18th century. He baked small balls of butter dough in the oven, calling them choux, which translated means cabbage.
By the way, Avis borrowed the name from the court chefs who prepared baked lumps of mashed potatoes. They used the name choux or “shu” for the first time, calling their dish “little cabbage.” Over time, the dough recipe for this dessert acquired a modern look.
Every pastry chef, baker or just an amateur cook brings something special, something new to the “shu” recipe. This can be seen from photos of sweets on the Internet and on the pages of culinary publications.
Classic shu recipe with crumble

To make your close acquaintance with the French dessert especially pleasant and memorable, it is best to use the so-called classic “shu” recipe. According to the traditional method, this cake is made from choux pastry with delicate Patissiere cream and crumble cap.
For crumble:
- butter - 90 g
- brown sugar - 110 g
- wheat flour - 110 g
- vanilla extract
The crumble is prepared very simply: all the ingredients are mixed with a mixer and then kneaded. Next you need to roll out the dough thinly. By the way, the recipe recommends using pastry parchment or silicone sheets with a piece of dough between them. Using a glass, squeeze out circles from the dough that are the size of the future “shu” bun. Place everything in the freezer.
For the test:
- fresh cow's milk - 225 ml
- salt - 1/4 tsp.
- butter - 100 g
- wheat flour 160 g
- granulated sugar - 20 g
- large chicken eggs - 4 pcs
First you need to prepare the oven by preheating it to approximately 180˚. Then, using a saucepan, boil the milk with sugar and butter. Add sifted and oxygenated flour here. Keep the mixture on the fire for no more than 30 seconds, while vigorously mixing the ingredients with a wooden spatula.
Next, the recipe says, the dough should cool. And, already in the cold mass you need to add eggs 1 piece at a time, stirring them thoroughly with a mixer. The resulting dough should be pasty and shiny, like a glossy photo, and flow smoothly from the spatula.
Pour the finished mixture into a pastry bag and place each cake separately on a baking sheet lined with parchment. Place the frozen crumble on top of the dough lumps. Bake them in a hot oven for about 25-30 minutes at standard 180 degrees.
For Patissiere cream:
- chicken egg yolks - 4 pcs
- granulated sugar - 100 g
- corn starch - 30 g
- wheat flour - 20 g
- cow's milk - 500 ml
- vanilla extract
Boil fresh milk in a saucepan, adding vanilla. Grind the yolks with sugar, add flour and starch, then pour boiling milk over the mixture and pour it back into the pan. Cook the cream until tender, stirring vigorously.
The classic recipe involves cutting off the top of the baked product, so the “cap” of the bun must be detached. And, using a pastry bag, you should fill the cake with the finished cream, and put the “cap” back in place.
Recipe for shou cake with raspberry confit

The preparation of choux pastry and crumble, of course, can be found by looking at the previous “classic” recipe for “shu”. But the cream and raspberry confit need to be prepared as follows.
For the raspberry confit:
- homogeneous raspberry puree - 200 g
- granulated sugar - 50 g
- pectin NH (thickener) – 4 g
- juice of half a lemon
Mix the puree with sugar and heat to 40˚. Add sugar mixed with pectin and boil. At the end of cooking, squeeze out lemon juice.
For cream:
- cream 35% - 500 ml
- powdered sugar - 100 g
- vanilla
- cream fixer
Beat cold cream with powder and fixative until it reaches the thickest consistency possible. It is necessary that the buttercream is as in the photo, that is, it does not spread and holds its shape.
When preparing a shu bun, you need to cut off the top. Place raspberry confit at the bottom of the product and pour cream on top. Attach the “cap” in place.
Voila! An exquisite French dessert is ready to be enjoyed.
Video recipe for making “Shu” cake
It turns out to be in size and filling. What we used to call “profiteroles” and cook with sweet creams is actually shu. Today I would like to present to your attention a recipe with step-by-step photos of preparing shu with craquelin, which is also often incorrectly called craquelure. These two concepts are similar - both are cracked coating, only the first is used in cooking, and the second refers to inedible.
What is craquelin and how to prepare it?
Let's start with him. Craquelin is a shortbread dough with which we will cover the shu before baking; in the oven it will crack and form a beautiful crispy crust with cracks on the cakes. Craquelin can be made in any color by adding food coloring to the dough. Those who avoid them may stain the dough with cocoa. I would not recommend painting with something like beets. The color will turn out to be an ugly dirty brown.
What you need for craquelin:
- flour – 200g;
- butter – 150g;
- sugar – 2 tbsp;
- salt - a pinch;
- ice water – 4-5 tbsp.
Cooking process
- Let's start with the dye. Everywhere they recommend adding gel, but I haven’t seen it here, I only bought the regular powder one. Therefore, I did the following: I dissolved a small amount in the same amount of water that is indicated in the list of ingredients. And since we need it very cold, we put it in the refrigerator.
- I make the base dough using a blender. If you don’t have one, then a regular grater will do just fine. We will need frozen butter. We divide it with a knife into small pieces.

- Place them in a blender bowl.

- Pour flour, add salt and sugar. Cover and grind for 30 seconds. The flour and butter will mix and look like the photo below:

- Take the water and dye out of the refrigerator and pour it into the mixture.

- Close the lid again and turn on the blender to blend.

- Remove the mixture from the bowl and knead it a little with your hands so that the dye is distributed more evenly. Wrap in cling film and put in the refrigerator for 30 minutes.

- After half an hour, take it out, cut it in half, put one part of the craquelin on one half of a sheet of baking paper. We are putting the second one in the cold for now.

- Cover with the other half and wrap the edges with an envelope.

- Roll out with a rolling pin in all directions to a thickness of 3 mm. Note! If it is thinner, then you will not be able to work with it further. If it is thicker, it will not bake properly in the oven.

- We remove the layer in paper into the freezer. Let it sit while we work on the second part.

- Then we swap them, take a glass of small diameter and cut out circles. The diameter of the circles should be approximately the same as the size of the future cakes. We do not remove the cut out circles. Place in the freezer until needed. We do the same with the second layer.
Choux pastry shu
While the craquelin is frozen, let's move on to the shu itself. For them we will prepare the second type of dough - choux.
Ingredients:
- butter – 100g;
- water – 180ml;
- flour – 200g;
- egg – 4-6 pcs (300g);
- salt - a pinch.
How to make brownie dough
- Pour water into a saucepan and add oil.

- We are waiting for it to melt.

- Pour in the flour and continuously stir with a spatula over moderate heat to make the dough.

- Once it has turned into a plastic mass, remove from heat. This happens quite quickly.

- Let it cool down. Meanwhile, weigh the eggs. I highly recommend weighing them because... The correct consistency of the dough depends on the size of the eggs. First, break 4 pieces into a bowl, then add up to 300 g. It happens that one whole egg is too much, then we take only the yolk.
- As soon as the mass has cooled and becomes warm, we begin to beat it with a mixer, adding eggs in parts.


- Transfer the resulting choux pastry into a cooking bag with a nozzle.


- Line a baking sheet with parchment. We take the same glass or shot glass that we used to cut out the craquelin circles and mark the circles on paper with a pencil.

- Place the choux pastry into circles.

- We take the craquelin out of the freezer, take out the cut out circles and place them on top of the blanks.

- Bake in an oven preheated to 220°C for 10 minutes. Then switch to 180°C and bake for another 25-30 minutes. The shu should be well baked. If you don't bake them enough, they will be soft and fall off. Then there will be no shape and no cream inside. Focus on the color of the bottoms; it would be better if they were darker than lighter. Why bottoms? Because you won’t be able to see the rest of the cake. The craquelin will first become soft due to the temperature and “hug” the rising shu, which will continue to increase in size and the craquelin will not withstand it - it will crack.
Cream for cakes shu
You can pump cream into such cakes using a syringe or a cornet with a pointed nozzle. Or, to simplify the process, cut off the top of the cake. The texture of the cream should be light, but stable and in no case runny. Protein custard is best suited for these purposes.
What is needed for the cream
- sugar – 140g;
- water – 50g;
- lemon juice - a couple of drops;
- egg white from 2 eggs.
How to make cream for shu cakes

And that’s it – the cakes are ready! Our little feat should be rewarded with delicious, crispy outside and tender inside cakes.

Need I say that they are perfect for February 14th - Valentine's Day and March 8th?
Pipe the dough according to the following suggestions.
- For profiteroles, hold the bag vertically, pressing on the top part, the dough will be deposited. When the dough begins to appear, place the profiteroles on parchment.
Using a piping tip (make sure the top of the bag is securely closed), make small balls between 3 cm (1.25 in) and 4 cm (1.6 in) in diameter. To break the line of dough, quickly unroll the bag and tear off the dough; the sharp peak can be easily removed by wetting your finger and smoothing the surface. Make sure you leave enough space around the brownies, they will double in size while baking.
Beginners often end up with sharp peaks, but with practice, your hand gets thicker, but this is also a sign of the wrong consistency of the dough. But with a wet finger you can smooth out any imperfections in the cake shapes.
- For eclairs, make long lines of 10 cm. or 4 inches at a time, the trick is to ensure that you spread the dough evenly along the entire length of the eclair. To interrupt the depositing, at the end, quickly point the bag in the opposite direction and remove it, so if you were depositing the eclairs from left to right, at the end, smoothly release the pressure and turn to the left.
- To make a swan-shaped cake, use a wider nozzle, pipe a small eclair 2.5 cm wide and 5 cm long, making a body. On another baking sheet, use a thin tip to make an eclair in the shape of the letter "S" 1cm wide, making a neck.
Form a beak at the end by sharply tearing the bag away from the baking sheet. This is difficult for a beginner; it’s easier to just form the beak with wet fingers. It is better to bake the bases and necks separately. Then cut the base and fill the swan's body with cream, attach the bird's neck.
- You can also make different shapes with the eclair, such as a ring, letters or any other shapes that you prefer. A large donut-like ring is made in relief and is called Paris-Brest; it is filled with cream and topped with chocolate sauce and praline.
- To make a large base or make a Saint Honoré dessert, cut out a paper template and place under the parchment. Use a piping bag and make spirals either from the outside in or vice versa. The dessert "Saint Honore" usually has such a base and on top it is assembled from cream and other parts. You can use the same method to prepare squares, pillows and other shapes.
- To make Croquembouche, you will need a large number of small profiteroles. Fill them with whipped cream or custard and form them into a large cone. As a rule, such towers are built around a cone-frame, or erected entire floors, glued together with salted caramel. If you use a frame, it should be tightly packed with brownies to make it invisible.
After erecting the tower, pour it with a shower of salted caramel, it is better to do this with several skewers, pulling out the caramel with light movements to create thin strands.
Articles on the topic