Drawings to draw on a cutting board. Master class “Painting a wooden board with the Khokhloma pattern
One of the oldest crafts of arts and crafts in Russia is Khokhloma painting. For more than three hundred years, craftsmen have been making incredibly beautiful dishes, which can already be called the calling card of the Russian people. The process of creating a masterpiece is quite complex; it includes both the creation of blanks and their processing, as well as further painting. But anyone can master this skill; you just need to learn about the characteristic features of the creative process.
One of the oldest crafts of arts and crafts in Russia is Khokhloma painting
It is customary to apply complex ornaments to products using a stencil, which can be purchased or printed, but in order to learn this type of painting, you need to master the basics. The simplest patterns are applied with a brush.
Beginners should first master the following:
- blade of grass The pattern is a sideways curved line. The brush is pressed in the center, and pressure is kept to a minimum from the edges. There is a smooth but strong thickening;
- curl. The element is more complex. The brush is applied with the same degree of pressure, and the line should be curled like a snail;
- droplet. Ideal for pressing training. In this case, the brush must be placed with the base of the bristles and rotated 180 degrees, slowly removing it from the surface and pulling it forward;
- bush. The droplets are drawn in the form of a fan, and a small dot is placed at their base;
- leaf Drawing this pattern is quite simple. You just need to draw out the blades of grass in a mirror image, bending them outward, and fill the void inside with paint of a similar color.
Gallery: Khokhloma painting (25 photos)


Master class on Khokhloma painting (video)
Elements of Khokhloma for preschool children: step-by-step templates
Even a small child can create a Khokhlo pattern with his own hands, having mastered basic skills. Children's drawings have always been valued and pleased the eyes of parents. Often, an activity such as applique is carried out in the senior or preparatory group of a kindergarten. To create a pattern, it is enough to make a stamp from a tube and paper into which the paint will be dipped. Smaller elements are already painted with a brush, as in the pictures.

Even a small child can create a Khokhlo pattern with his own hands, having mastered basic skills
Drawing with children:
- lingonberry. Using a stamp, red circles are drawn, which do not need to be supplemented with other elements;
- currant. Berry circles are collected near a blade of grass, on which golden dots must be placed with a brush;
- Rowan. Berries are drawn with a stamp, and fairly narrow and elongated droplets are added with a brush, as well as leaves at the base of the resulting bunch. Additionally, you need to make inclusions of gold color;
- raspberries. Six circles are drawn with a stamp, without maintaining a certain distance, but slightly overlapping one on one. Highlights are added using the grass blade technique. Additionally, dots are placed with a brush;
- sepal. Blades of grass are gathered together, a twig and leaves are drawn.
Decorating a kitchen board: Khokhloma painting on wood step by step
Khokhloma painting is more often used when painting on wood.. Craftsmen often resort to decorating kitchen boards with classic patterns. This product can be presented as a souvenir to guests, or you can decorate your own kitchen.
What you will need:
- cutting board;
- glue;
- gouache;
- egg white;
- paper;
- pencil;
- paint brushes;
- paint brush.

Khokhloma painting is more often used when painting on wood.
Progress:
- Coat the board with egg white and leave to dry.
- Take paper and draw a sketch on it with a pencil.
- Now apply gold paint to the board and let it dry.
- Transfer the drawing to the board.
- Color floral patterns and berries red.
- Draw the stems and veins with thin stripes.
- Thinly outline all the contours with a brush.
- Color the board so that the drawing appears on a black background.
- After the paint has dried, continue painting.
- Add green grass.
After the board has completely dried, apply varnish to its entire surface.
Khokhloma painting on a plate: step-by-step description
Decorating a plate or wooden spoon with an ornament is not at all difficult, the main thing is to know the basic principles. The drawn elements look colorful and solemn. Even a schoolboy can cope with this task.
What you will need:
- acrylic paints;
- pencil;
- tassels;
- palette;
- disposable plate;
- jar;
- ornament.

Decorating a plate with an ornament is not at all difficult
Progress:
- Choose a pattern that will be applied to the plate. It could be a rooster, a bird or simple berries.
- Transfer the ornament to a plate.
- Make the bon red.
- Carefully paint all other elements.
- Be sure to make a black rim both on the inside of the plate and along the edge.
- Add droplets along the rim.
- Leave the plate to dry completely in a suitable place.
Apply varnish and let the product dry.
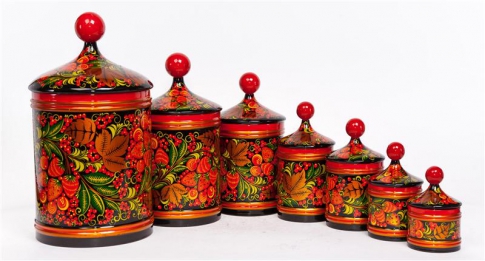
Painted Khokhloma box: master class
The very name of this product indicates its nobility and grace. The box turns out to be fabulous, traditionally colorful, but very unusual.
What you will need:
- paints;
- background paint (bronze or copper);
- masking tape;
- squirrel brushes;
- varnish brush;
- pencil;
- tracing paper;
- sandpaper;
- wooden box.

The box turns out fabulous, traditionally colorful, but very unusual
Progress:
- Plaster all uneven areas on the box. Only after the surface becomes smooth can you begin to work.
- Cover the surface of the product with background paint and wait until it dries.
- Draw a drawing on paper that will later be applied to the box.
- After the box has dried, transfer the prepared sketch onto it with a pencil. To do this, attach the paper to the box itself using tape.
- Outline the design with black paint using the thinnest brush.
- Paint larger elements black as well.
- Wait until the black paint dries.
- After this, paint all the other elements and give the paint more time to dry.
- Additionally decorate the product with tendrils and droplets.
Apply varnish to the box (at least two layers) and let it dry.
The most popular ornaments of Khokhloma painting
Before you begin such an original painting of a jug or plate, you need to find out which of the ornaments are most often used in the creative process.
In most cases, craftsmen resort to applying the following:
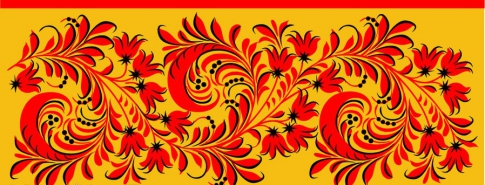
- grass pattern. The grass in this case only vaguely resembles sedge growing in a meadow. It is applied to products only in black or red, but nevertheless this pattern is perceived as herbal;
- saffron milk cap This is a pattern of individual blades of grass. It is used in the process of framing various kitchen utensils;
- Kudrina. The ornament is characterized by all kinds of curls and rings that unobtrusively encircle berries and flowers. Suitable for painting round objects, as well as flat ones, such as chairs and tables;
- Gingerbread. This is a geometric figure that fits into a rhombus or square. Suns with twisted rays are drawn in the center of the ornament.
Since ancient times, our ancestors painted various patterns on wooden surfaces. After all, painting on wood looks great both on rustic frames and on kitchen wooden utensils; it is also appropriate in the interior of residential premises.
Perhaps someone would like to try decorating their home with painted household items, but does not know where to start or what is needed for this. For this you need, besides brushes and paints, very little - most of the necessary things can be found at home.
We prepare everything for work
Before you start creating an artistic masterpiece, you need to prepare in advance everything that may be useful during the work process:
- blanks (any wooden item that you plan to make beautiful and unique);
- soft pencil;
- eraser;
- sandpaper of various grain sizes;
- paper sheets (for those who work from sketches);
- a set of brushes of various thicknesses;
- palette;
- templates (for those who cannot draw);
- paint;
- primer;
- transparent varnish (it is advisable to coat the finished pattern with varnish so that it is less damaged);
- container for liquids (for water or solvent, depending on the colorant).

The wood primer is selected according to the type of paint, but the choice of paint must be taken seriously.
Features of coloring materials
Most often, home craftsmen use the following types of paints when painting on wood:
- gouache;
- watercolor;
- acrylic;
- aniline;
- oil
Gouache
In another way, these dyes are also called poster dyes. They are a thick, opaque mass. They are easy to work with, but complex designs with many shades are impossible to create. To draw, gouache must meet the following requirements:
- easy to apply to the surface;
- After drying, do not wear off or crack.
In order for the pattern drawn with gouache to hold more firmly, to dilute the paint, use not water, but an aqueous solution of PVA glue in a 1:1 ratio. This allows you to do without preliminary priming.

Gouache drawings always turn out bright, colorful, and the dye is cheap. Gouache is suitable for those who are starting to master wood painting and create their first masterpieces.
Watercolor
Everyone is familiar with the simple watercolors that schoolchildren use to paint. Compared to gouache, they are more transparent and allow you to create a complex pattern with many shades. In order to get a beautiful drawing, watercolor must:
- lie flat on the surface of the workpiece, without stains or streaks;
- After drying, hold firmly.
The main advantage of watercolors is that if mistakes occur while drawing, the product can be washed, dried, primed and painted again.
Acrylic
Acrylic-based paints are among the best, and painting on wood with them is not only beautiful: acrylic dyes additionally protect and strengthen the material. Manufacturers of artistic paints offer a wide color palette for painting, but it is not profitable for beginners to use them.
Why? The fact is that acrylic compositions are quite expensive, so for beginning artists who have not yet fully mastered the technique of drawing, it will be expensive to use them. But those who have already achieved some experience can create their own masterpieces with them to decorate the interior.
Oily

The dye is diluted to a working consistency with the recommended solvent (White spirit, drying oil), after which you can paint. But oil paints have the following features:
- they give only bright shades (you can use them to paint an object like Khokhloma or make a stylish gold pattern on a black background);
- durable, once dry they cannot be removed.
Those who have at least a little experience in painting will enjoy working with oil paints, because they can be used to decorate the interior of living rooms inexpensively and for a long time.
Aniline

Aniline-based dyes are increasingly found in the interior of houses; they are used to paint wooden walls or small decorative objects, and in rural areas craftsmen decorate their homes with them. Aniline dyes have a number of positive qualities:
- They are easy to draw with.
- You can get many beautiful shades with them.
- They are inexpensive.
Getting ready to paint
Before applying beautiful patterns, the base must be prepared. To do this you need to do the following:
- sand with sandpaper, gradually changing from coarser to finer, the base until smooth;
- coat the surface with a wood primer that matches the paint being used;
- wait for the primer to dry and apply a color base, painting the product with the desired color.
After the color base has dried, it is possible to apply a design using any technology.
How to make a drawing
Depending on the level of skill, painting on wood can be done using the following technologies:
- point;
- using a stencil;
- drawing from sketches.
Stencil method
Drawing using a template is the simplest: all you need to do is place the stencil on the surface, trace it with a soft pencil, and you can paint it. You can make a stencil yourself by copying any picture you like or asking a familiar artist to make a template.
Point method
The dot technique also helps to create beautiful things for those who do not have artistic skills. The point method consists of drawing a set of reference points on a sketch drawing and copying it as accurately as possible from the selected sketch onto the surface to be painted.
The dot drawing method requires some skills. But maybe it’s worth remembering how in childhood we connected numbers with lines and got some kind of silhouette? The point-by-point method of painting is based precisely on this, and the more points are transferred, the more accurate the match will be with the selected picture, which then will only have to be colored.

The point-by-point method of transferring a picture onto a base allows those who have almost no drawing skills to create artistic masterpieces. Simply copy one or more drawings using a soft pencil and color. You can do it as it was in the original, but it’s better to show your imagination and choose your own colors.
According to sketches
This technique involves free creativity when a sketch is drawn, and then transferred to a base and painted. Sketches can be both elements of a painting (for artists) and any geometric elements (for those who do not know how to draw professionally). Using sketches, you can come up with your own unique pattern for drawing, and it doesn’t matter what is used: geometric shapes, plant elements or free professional creativity.
Painting wooden objects is not difficult. By mastering one of the proposed techniques and choosing the right paint, you can create real masterpieces, making your home or apartment interior truly unique.
When starting to draw in Photoshop, we first create a new canvas of sufficient size. It is important to remember that a canvas that is too small will not allow for good detail in the image, and one that is too large can be a real disaster for a weak computer. So, we have created a new document, then fill the background layer with gray, create a new layer and start drawing the board.
We use a slightly rich orange shade as the basis for our board. Draw the shape of the board, and make the bottom a little darker, so that the orange begins to turn into a reddish brown. Using a less saturated orange (here you need to slightly tighten the sliders to yellow) we apply small oval spots on our board. This will help create a variety of colors on the board.
To draw cracks on the board we choose brown color. It is important to remember that the cracks should not be exactly the same shade. Where the base of the board is lighter, the cracks should be made a little lighter accordingly. We use light beige color to draw illuminated corners, edges and worn areas. We add scratches for greater realism and try to ensure that all the flaws are different in shade.

The lines should vary in thickness - this will make the drawing more lively and natural. Add some dark lines to the edges of the board.

Create a new layer with the blending mode Multiply and a light beige tone and draw in the dents, creating an interesting structure of the board. Then you need to change the opacity of this layer to about 20-25 percent at your discretion, and in some places erase the dents with a soft brush.

Create another layer, this time with the Overlay blending mode. Now we need a light gray color to draw the edges on the dents. Set the transparency of this layer to between 50-65 percent.
Recently, there has been a tendency in society to turn to national traditions - this is manifested in the return of popularity of folk literature, rituals, and clothing. For example, many designers have Khokhloma painting in their collections, which attracts with its bright, almost fairy-tale pattern.
Khokhloma painting - the history of creativity
Khokhloma painting- a special type of drawing that appeared around the 17th century in the Nizhny Novgorod region. This work received its name thanks to the town of Khokhloma - a large center at that time, which attracted merchants from all over the area.
There are two versions of the origin of this type of painting: the first attributes the idea of creation to the Old Believers - adherents of the so-called “old” Christian faith before the adoption of various religious reforms at the beginning of the 17th century.
Many of them, fleeing persecution for their beliefs, moved to the Nizhny Novgorod lands, bringing with them the skill of icon painting, book miniatures, a huge baggage of symbolism and patterns for painting. At the same time, tableware masters lived here, creating magnificent kitchen utensils from wood.
Having united, both human skills gave rise to the most beautiful tableware painting.
Supporters of the second version argue that the Nizhny Novgorod people used the method of imparting gold to kitchen utensils and then painting them even before the appearance of the Old Believers. In the large artisan settlements of Murashkovo, Semenovskoye and Lyskovo, they created wooden utensils that were painted “to look like tin” - that is, they used technologies that preceded the appearance of Khokhloma, which became on par with the favorite decoration techniques: carving and wood burning.
Khokhloma painting - technology
The basic technology for creating products to which Khokhloma painting is applied consists of several stages. Initially, the master does his best - prepares rough wooden blocks of approximately the same size as the product should be.

The next stage is planing on a special machine the object itself: plates, spoons, bowls, ladle, etc. This is how the master receives linen - a wooden blank for painting, which must be primed with liquid purified clay and left to dry for about 7-8 hours.
The key point in the work process is coating the item with drying oil or special linseed oil. The strength of the dishes and the durability of the painting on it depend on the quality of the coating. Using a special sheep's wool swab turned inside out, the master scoops drying oil from a bowl and begins to quickly rub it into the wooden surface - in total, the procedure is performed about three to four times during the day.

The last layer of drying oil is dried to such a state when the master’s finger sticks slightly to the coating, but no longer gets dirty. This technology prepares the item for the next stage - tinning, which involves rubbing aluminum powder into the item. The process is also performed using an inverted sheep's wool swab.
Only after these preparatory stages is Khokhloma done - painting a picture in a floral or animal pattern. The main colors used are red, black, yellow, but sometimes craftsmen also use green and brown. Drawings are made with oil paints using the technique of overhead painting or “under the background.”
Horse letter
The principle of top writing is very simple - a red, yellow or black pattern is applied to the processed workpiece.

Usually, Khokhloma painting This technique uses a “gingerbread” pattern - a large pattern in the center, which is surrounded by circles of smaller ornaments.
Drawings for the background
Masters of painting “under the background” use the “curl” pattern - gold and red patterns on a black background.

They are obtained as follows: initially, large colored ornaments are drawn, after which the free space is filled with a black background. When the dark paint dries, a “grass” pattern is applied on top - patterns of long and short blades of grass.
Finished works are coated approximately 5 times with a translucent fixative varnish with a yellowish tint, after drying each layer. Dry products are sent to an oven heated to 150 degrees and kept there for about 3-4 hours, until the main element of Khokhloma is formed - a golden-bronze film.
Khokhloma painting templates
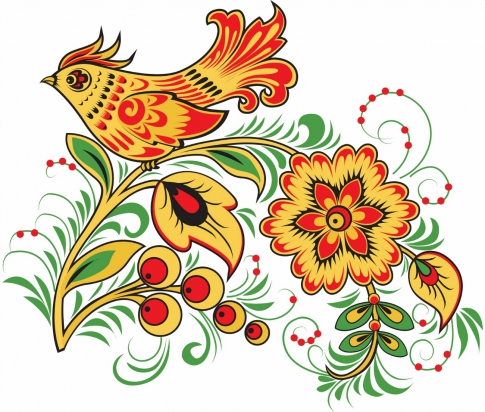
Khokhloma painting uses mainly pictures of plant origin - meaning blades of grass, berries, twigs, stems of climbing plants and flowers. Drawings of roses, rose hips, rowan, and grass are especially common.

However, masters often resort to animal ornaments, depicting fabulous birds, animals and insects in motion, forming simple scenes.
Despite the fact that the theme of the painting is clearly defined, masters must approach the process creatively, each time inventing unique drawings. Beginners, due to lack of experience, can use stencils to make Khokhloma painting look beautiful.
You can practice not only by redrawing ready-made drawings. Use these simple diagrams to help you draw simple floral designs.

By repeating the pattern several times, you will get the hang of it and creating interesting drawings with oil paints will be as easy for you as learning to draw with a pencil.

The diagrams show that when drawing, not only brushes of different sizes and shapes are used - some drawings can be made with stamps. Seals can be easily made from available materials: a round grater on a simple pencil, a vegetable or fruit cut in half.

The main use of the technique is to decorate dishes, but recently the beautiful pattern has become so popular that it has been used almost everywhere. For example, dresses, T-shirts, and jewelry with Khokhloma painting have come into fashion.

In addition, cars, bicycles, key rings, boxes, furniture are decorated in this way - it all depends on the imagination of the master.
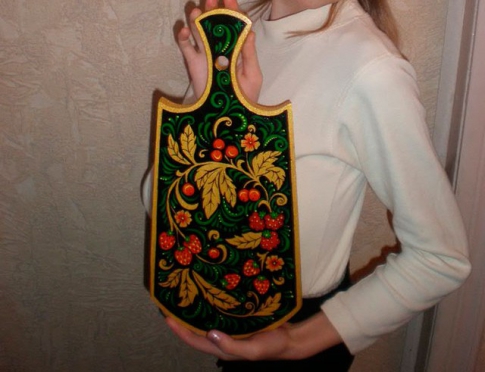
Step-by-step drawing - painting Khokhloma on a board
In fact, you can decorate items with Khokhloma even at home without using the complex basic technique described above. It is enough to paint the board with gold paint, draw patterns and fix it with a special varnish. Such a product can hardly be used for its intended purpose, but you will get an excellent souvenir for decorating the kitchen.
Prepare a wooden cutting board of the shape you like, PVA glue, gouache paints, wood varnish, painting brushes, and a paint brush.

- On A4 sheet of paper, draw the selected sketch of the image with a simple pencil - come up with it yourself or borrow an image from our article.
- Prime the board with egg white - just coat it with the substance and leave until completely dry.

- Apply an even coat of gold paint to the piece and let dry again.
- Using carbon paper, transfer the design onto the workpiece.

- First, color the berries and flowers red.

- Next, paint the veins and stems with thin black strokes.

- Using the brush that is most comfortable for you, draw a thin line around the outline of the design.

- Paint the background black.

- After the background has dried, paint the grass in a bright color.

- Leave the product in a dry, ventilated area until completely dry.
- Apply a clear sealer over the entire surface of the board.

Your souvenir is ready! You can decorate your apartment with it or give it to a close friend for some holiday. In the same way it is done Khokhloma painting souvenir plate, spoons or any other product.
You can learn another simple technique for painting Khokhloma products at home from the following video tutorial.
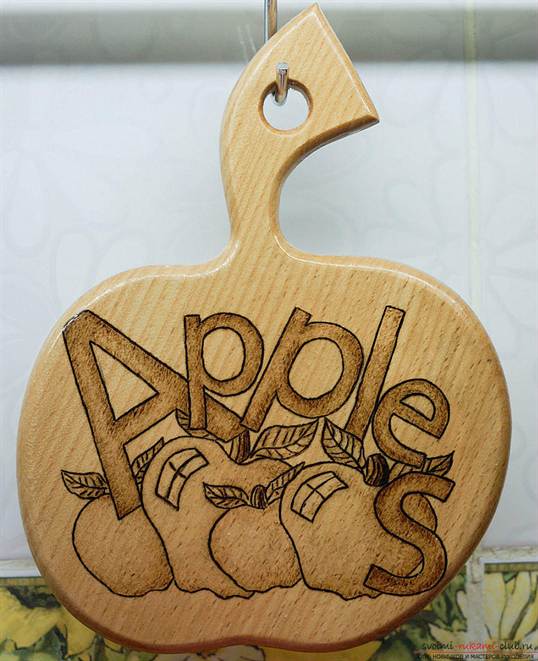
Often, when we come to a housewarming party, we think in stereotypes and give tea sets or dishes. But what if each guest comes with a set of cups or plates? We advise you to pay attention to such a wonderful gift as a cutting board, especially since you can paint it yourself. Or rather, not even paint it, but burn your own drawing on it! The topic of designs for burning on a cutting board is very popular today, and that’s what we’ll talk about.
Even if you have no experience in pyrography or wood burning, it’s okay, this activity is available to everyone: both adults and children. There is absolutely nothing to be afraid of here, because pyrography is not difficult, but very exciting. You can see an example in the photo.
Wood burning designs are easy to find online and there are a wide variety of templates and stencils that are suitable for beginners. The main thing in this matter is to be patient and have 1.5-2 hours left for a simple drawing.
What you will need

First of all you need pyrograph. This is a special wood burner. It can be purchased at craft stores. The pyrograph also comes with a special set for wood burning. This set includes a board (not a cutting board) and a ready-made stencil for burning.
It is very easy to buy a set; today they are distributed in almost all hobby hypermarkets and handicraft stores.
You will also, of course, need cutting board. It is best to choose a board made of light wood. Linden or birch are perfect. The next thing you need is sandpaper. Acrylic or watercolor paints will also come in handy. paints, to decorate the board with color. Additionally you will need wax to carry out the waxing procedure after finishing painting the finished drawing. Waxing will add richness to the image and preserve the colors of both wood and paint for a long time. You will also need stencil and pencil to transfer the drawing to wood.

Learning to translate

Many people ask the question “How to transfer a drawing onto a board?”, so this is done using a stencil. You need to find and download pictures of fruits, flowers or animals that interest you, as these are the most commonly used patterns for wood burning. It is best to choose simple templates, especially if you are doing pyrography for the first time.

Print the downloaded stencil and cut out the figure if the figure in the picture is empty. If there are additional internal parts, you need to use carbon paper. Place it on the wood, place the printed stencil on top and trace the design. Try not to let the image move.

There is another way to transfer a picture to the board. You also need to print the stencil you like, printed in a mirror image. Prepare a bowl of water, decoupage glue, wood varnish, acrylic paints, a brush and a sponge.
Cut out a stencil or finished design, then carefully coat it with decoupage glue and attach it to the wooden surface with the design facing down. Smooth the design with a sponge so that it does not “bubble” and also so that there is no excess glue left. Let dry. It is best to leave the work to dry overnight.

Once dry, moisten the motif with a damp sponge and begin to erase the paper until the design appears on the wood. Carefully get rid of all the paper. Then we begin to rub the remaining paper with our fingers, making pellets that remain on the wooden surface. We brush them off the tree, and what remains is a finished design, which, after complete drying, can be supplemented by burning (for example, burning its outlines) or simply decorated with paints. Then coat the work with varnish.

Mastering the technique
Once the design is traced onto the board, it’s time to start burning. Make sure the board is completely dry. Then heat the burner until the nib turns dark red.
Be careful when working with a hot pyrograph, it is very dangerous! It is better to do everything more slowly, but there will be no consequences.
Burning is best done from the contour to the center. That is, we first outline all the outer edges and only then move on to the inner ones. It is best to burn in separate areas: once you have worked on one, move on to the next, but in another part of the drawing. This will allow the drawing to cool evenly and will not create unnecessary lines or random strokes. When the work is completed, it can be decorated with paints. And then treat it with wax so that the board has a shine.
Let the owner of the house decide for himself whether to use your gift in everyday life or hang it on the wall or put it on a shelf. In any case, your gift will find a worthy place in the kitchen and in the heart of your friend!


Articles on the topic