How to carve a carriage from a pumpkin with your own hands. Three master classes for a do-it-yourself pumpkin carriage
Every autumn, thematic exhibitions under the general title “Gifts of Autumn” are held in kindergartens and primary schools. And the main characters in them are crafts made from vegetables and fruits.
From zucchini, pumpkins, cucumbers, tomatoes, potatoes, melons, watermelons, apples, grapes and other natural materials from branches and beds you can make:
- Figures of animals, birds, cartoon characters, people
- Constructions - appliances, houses, household items, dishes
- Flat paintings and panels with different subjects
- Flowers and animals using carving technique (not to be confused with)

Artistic carving of vegetables and fruits
Another technique for making crafts from vegetables or fruits with your own hands is Carving(cutting out). This is when everything unnecessary is cut off from the original form and a new figure is obtained, similar to something or someone.


Banana, eggplant and broccoli dog


Watermelon turtle

Watermelon dinosaur head

Zucchini shoes

Pig salad bowl with watermelon, berries and melon

Watermelon submarine

Bell pepper frogs
You can also cut flowers from vegetables and fruits. A sharp knife and our master class will help.
Master class “Bouquet of pepper tulips”
The flowers turn out to be very authentic, especially after 12 hours - the wilted petals close, closing around the centers. But this does not spoil the view.


Photo after 12 hours
To work you will need:
- fleshy bell pepper - yellow and red
- cherry tomatoes - small and even
- barbecue sticks
- squash (for base)
- vase - ours is woven from paper tubes
- mug
- red cabbage leaves, green hot peppers and viburnum sprigs - for decoration
- tapeplant
Using a sharp, short knife, we cut out the peaks on the pepper, trying to ensure that both halves are neat and go into use. We wash one part, where the testes are, in water, removing the seeds and core. This can be done by hand.

Now we place the flowers on a skewer, leaving 2 cm in the middle for attaching tomatoes. We tape the stem.
The side without the base of the pepper is very soft and can quickly slide down the stem. We make a support at the bottom - we reinforce the top with electrical tape, and then on top of it - green tape.


We put a small squash into the mug - this is the basis for the bouquet. You can also use a small pumpkin or green zucchini for the vase.

We set up the bouquet. We decorate it with cabbage leaves, viburnum branches, and green hot peppers.

Crafts with added decorative elements
You can add decor from other materials to vegetables and fruits: plasticine, foamiran, feathers, material, as well as beads, buttons, berries.
This is how potato piglets appear:


Pumpkin fashionista:

Watermelons and pumpkins make wonderful samovars, teapots, flower vases, clocks and funny masks for Halloween.


And “Cross” offers you another master class.
Master class “The Wise Turtle”
Tortilla doesn't need any introduction. This is a famous character from the work “The Golden Key”, whom all readers love. The turtle is a symbol of wisdom, so we will make a fairy-tale hero.

We will need:
- half a head of cabbage
- large dark green cucumbers (without pimples)
- wooden toothpicks and 3 skewers
- base - flat plate and greens
- floral wire
- fabric for a cap, braid, needle and thread
- scissors for cutting toothpicks
- eyes

Let's start with the shell. Cut the cucumbers into slices of equal thickness. Divide the toothpicks in half with scissors or a knife.
If you break the toothpicks with your hands, you will get uneven, furry edges, and they will ruin the overall picture of the shell.
We attach each circle to the cabbage base with 3 wooden “nails”. This is enough to hold the cucumber.

For the head, cut the end of the cucumber to the required length. We select it so that the head and neck are similar - round and even.
For the beauty of the craft, we decorate the place where the neck is attached to the body with a cucumber “washer”: we make a circle of cucumber, remove the middle and put the neck on the blank.
In the body we will provide a place for the neck and select some leaves from the cabbage.

When the entire shell is ready, we will attach the turtle’s head and neck here with skewers.

We make eyes, roll the wire in the form of glasses. We make a cap from a circle of fabric.


We make legs from four columns of cucumber and attach them to toothpicks. Place the turtle on a flat plate. For beauty, we cover it with red cabbage leaves. You can use any greens.

For the surroundings - tagetes flowers, and the image of the wise and sometimes even flirtatious turtle Tortilla is completed!
An excellent and long-lasting version of turtle is made from green zucchini squash.

Secrets and subtleties of creating crafts
- Before starting work, all vegetables must be washed, dried, and then used as material for creativity.
- Wooden toothpicks, skewers, and floral wire will help.
- It is imperative to take into account that crafts made from vegetables or fruits have a short shelf life. Soft tomatoes and juicy cucumbers, for example, quickly “leak”, and this must be taken into account when composing compositions.
- It is better to use “long-term” vegetables and root vegetables: potatoes, pumpkin, zucchini, cabbage, onions.
- Ideally, crafts should be prepared immediately before the exhibition, if time permits.
- It is best to place each craft on a base/stand. Otherwise, the composition will not have a logical conclusion.
YOU WILL NEED IT
Take advantage of our tips and master classes on creating a wide variety of! This is an interesting, fun and useful hobby for children and adults!

Crafts for kindergarten are an important moment in the development of a child’s creative potential. A special place is occupied by autumn-themed pumpkin crafts, which children usually do together with family members. Preparing a pumpkin for crafts. When working with vegetables, you will need a well-sharpened knife, so parents should take care of all the cutting work. If you want the composition to last for several years, you should dry the pumpkin in advance. You need to make a small hole by cutting off the cap. Carefully and completely remove all the seeds from inside the pumpkin and wipe the sides with a paper towel. To dry completely, place the vegetable in the oven or microwave for 1-2 hours at 80 degrees or 500 Watts, remembering to turn it periodically so that it does not burn.
Pumpkin crafts for kindergarten on the theme of autumn. 7 ideas
There are many different options for crafts that can be made from pumpkins.
1. Pumpkin vase
You should first inspect the vegetable for stains, unevenness and damage. A medium-sized pumpkin with a uniform color is suitable for a vase.
For crafts you will also need: a knife, a glass, flowers, floral foam.
Step-by-step execution
- Rinse and dry the vegetable thoroughly.
- Make a cutout on top, the diameter of which should be slightly larger than the base of the glass.
- Using a spoon, remove all the existing pulp and seeds inside the vegetable without damaging the base, otherwise all efforts will be in vain.
- You can fill the glass with floral foam and place fresh flowers.
- Place the glass inside the pumpkin. All! The craft is ready.

Such a creation can last 1-2 months. So that the craft can last longer and delight children’s eyes for 3 or even 4 months, you can treat the outer part with heated paraffin.
2. Pumpkin snail
For the perfect snail you will need 2 pumpkins. One of them should have a slightly elongated shape, and the other should be round.
Step by step
- A round pumpkin is useful for a snail shell. It is necessary to cut off ¼ of the pumpkin. The cut side will be on the bottom side.
- The narrower side of the oblong vegetable is cut off and attached to the shell. After this, it’s worth giving the snail a lively look.
- Using a sharp knife, a spiral cut is made on the shell.
- Afterwards, you can glue various colored decorations (paper, booties) onto the sink. This way the snail becomes more colorful and cheerful.
- Then you need to move on to the snail horns. To do this, you need a well-twisted fishing line, onto which large beads are placed tightly. The resulting horns are attached to the snail's head with the sharp edge of a fishing line. Make two antennae from the fishing line.
- To make eyes, large buttons or circles of thick cardboard paper will be useful.
- Small, but quite important details in the form of a mouth and nose will create a completely finished image of a snail. The same fishing line will be useful for the mouth, and a small button will do for the nose.
3. Pumpkin candle holder
A rather original and beautiful decoration that will decorate any corner in the kindergarten and create an atmosphere of comfort.

For this, in addition to the pumpkin, you will need: a knife, a large candle, glue, small cones, artificial or live leaves, branches with rowan or other berries, a bright felt-tip pen.
Step by step process:
- Cut off the top of the pumpkin. Place a candle on top, circle it with a felt-tip pen, cut off the outlined outline. The main thing is that the candle holds tightly and does not fall. It is advisable to first clean the pumpkin from seeds and pulp so that the pumpkin will last longer.
- If the candle is not stable enough, glue will come to the rescue.
- Also, with the help of glue, decorations in the form of leaves, cones and twigs are attached to the candlestick.

The main thing is to choose the right height of the candle so that it is at least 4-5 cm higher than the decorations, so that they, in turn, cannot ignite.
4. Merry pumpkin men
This craft will clearly interest little creators and involve them in the creative process. Apparently every child has a favorite cartoon character.
To do this, you will need several pumpkins of different sizes, felt, glue, scissors, artificial decorations (you can use flowers).
Step-by-step execution
- Make mustaches, bows and other elements for the character from felt. Glue them onto the pumpkin.
- For a more interesting look, you can use old unwanted glasses or make them from thick cardboard paper and glue them.
- Place a cap decorated with flowers and other decorations on top.

5. Children's pumpkin craft: owl
A craft made from a pumpkin in the shape of an owl is not difficult at all and the child will happily take part in the process of its creation.
You will need 2 pumpkins (one smaller for the head, one larger for the body), sharp scissors, felt, PVA glue and hot glue.
Step by step execution:
- Cut out eyes, beak, ears, wings and feathers from felt.
- Using hot glue, attach the bottom of the small pumpkin to the surface of the large one, thus creating the silhouette of an owl.
- Carefully attach all cut out elements to the pumpkin using glue. It's worth starting with feathers. For a more colorful look, use colored feathers. They need to be glued in a checkerboard pattern, filling the entire designated area (there is no need to glue the feathers closely, you can leave a space of 1-2 cm between them).
- Now you can move on to gluing the remaining parts - eyes, ears, wings, nose.

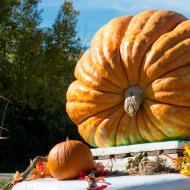
6. Craft a pumpkin carriage on an autumn theme
This craft will require a lot more time and effort, but it's worth it. A pumpkin carriage looks very beautiful, fabulous and magical. This craft will especially appeal to little princess girls who dream of being in Cinderella’s place. Therefore, in addition to the carriage, you can sew a dress for your favorite doll, which will then decorate the carriage.
A medium or large sized pumpkin with a smooth surface without damage and a symmetrical shape is suitable for this.
You will need one large pumpkin and 4 small ones for the wheels, cardboard paper, wire, a felt-tip pen, a knife, thin and thick wire.

Step-by-step work process:
- Cut off the top of the pumpkin and carefully remove all the insides (seeds and pulp) with a spoon.
- Use a knife to cut out round or square windows and a door. You can draw the outlines with a felt-tip pen in advance so that the cutout has ideal shapes.
- Now you can move on to the wheels themselves. Several materials are suitable for this:
- thick cardboard paper. Take a cup, vase or other object with a round bottom. Trace on cardboard and cut out 4 circles of the same size. It is worth choosing cardboard of bright colors, which can later be painted;
- pumpkins. It is worth choosing 4 small pumpkins of the same size; if you don’t have any, any other vegetables or fruits will do. The wheels will look impressive, but will not last long and will lose their shape and appearance within a couple of months;
- wire. This is more labor-intensive work, but such wheels are strong and durable. Having made the shape of wheels from wire, you can wrap them with foil or iridescent fabric.
- To attach the wheels to the carriage, you need to use skewers to poke holes under the wheels and attach them.
- The front and rear wheels can be fastened with wire in a crisscross pattern. This creates a carriage stand.
If you want the craft to stand for a long time, you can put crumpled paper inside. Afterwards you need to dry the pumpkin, avoiding exposure to the sun.

When the carriage has dried, you can move on to its colorful design. To do this, you can use felt-tip pens, markers and paints. Stones and rhinestones are suitable as decorations.
To turn your craft into a real masterpiece, you can do the interior decoration. In this case, you can install a children's doll table and chairs (glued to the base of the carriage with glue). Place small dolls in beautiful outfits at the table.
7. Craft a birdhouse from a pumpkin
In addition to the original decoration, such a pumpkin will also bring benefits. A birdhouse can be hung on the territory of a kindergarten, which will serve as a house for birds.

The craft is quite simple to make
- Use a knife to make a hole into which birds can easily fly. It is worth making sure that all the insides in the form of pulp and seeds have been removed.
- To give the birdhouse an attractive look, you need to decorate it.
- At the top of the pumpkin you need to attach a strong hook (made of wire or rope) with which the birdhouse can be hung on a tree.
The list of crafts does not end there. By showing your imagination, you can come up with many original ideas.
The article was written and prepared by: A. Kasatova
Useful tips
Today they are just as popular, but instead of dishes they are used to make various decorations and crafts.
Usually pumpkins are used to make crafts for Halloween, but on other days you can make regular crafts for school or kindergarten, home or to the country.
Pumpkins come in different shapes, sizes and colors, which means they are an excellent material for all kinds of crafts.
Kids Pumpkin Crafts: Halloween Head

You will need:
Pumpkin of any size
Felt pen
Acrylic paints
Spoon (if necessary).
1. Cut off the bottom of the pumpkin if the pumpkin is wide, or the top if it is elongated, and scoop out the insides with a spoon.


2. Using a felt-tip pen, draw a face that you will then cut out of the pumpkin. It's better to draw something simple to make cutting easier.
3. Take a thin kitchen knife and begin to carefully cut out the face. You may need both a large and a small knife to more clearly cut out some of the pumpkin's features, such as the teeth and eyes. You can also print out a face on paper in advance, attach it to the pumpkin and make the necessary marks.


Cutting is not at all difficult, the main thing is to have patience.
* Once the face is cut out, you can insert a candle into the pumpkin and you will have one festive detail.
DIY Pumpkin Craft for Kids: Glitter Pumpkin
You don't need to cut anything out of this pumpkin. You can make a beautiful craft using only glitter and simple acrylic paints.

You will need:
White pumpkin
PVA glue
Sequins
Tassels
Sponges
1. Take your brushes and apply PVA glue to some areas of the pumpkin.
2. Using sponges, apply glitter to the glue.


* Experiment with patterns - apply glue so that you get different lines and shapes, then simply sprinkle glitter on the places where the glue is applied.
* Instead of glue and glitter, you can simply paint the white pumpkin with acrylic paints, drawing different patterns and shapes.
Autumn themed pumpkin crafts: pumpkin vase

You will need:
Plastic or glass cup
1. Cut out the top of the pumpkin and discard its contents. It is advisable that the hole from the cut crown be slightly larger than a glass.


2. If possible, cut a small recess for the cup.
3. Insert a plastic or glass cup into the pumpkin and pour water into it.
* Make sure the glass is securely positioned in the pumpkin. If necessary, make a slightly deeper hole in the bottom of the pumpkin so that the glass fits well into it.
Here is another version of such a vase, only larger:


How to make a pumpkin craft: candle holder

You will need:
Thick tall candle
Felt pen
Autumn leaves (artificial and/or real)
Twigs with berries (rowanberries, for example)
Little bumps.
1. Remove the tail of the pumpkin. Place the Candle on top and trace it with a felt-tip pen - this way you will know how much to cut out from the top.
2. Cut off the top of the pumpkin so that the candle fits snugly inside the pumpkin. If desired, the insides can be removed.
*You may need to use glue to better attach the candle.
3. Using glue, attach decorations to your candle holder (autumn leaves, twigs with berries, small pine cones, etc.).
* The candle should be tall enough to rise a few inches above the decorations to prevent them from catching fire.
Pumpkin craft for the garden: funny little people

You will need:
Pumpkins of different sizes (preferably white)
Scissors
PVA glue (preferably superglue) or a glue gun with hot glue
Various accessories (glasses, hats, wigs)
Artificial flowers and other decorations (optional).

1. From felt, cut out bows, mustaches and other details that your little people may need.

3. You can use old glasses or make glasses out of felt or cardboard and glue them on too.
4. Add a hat, flowers and other accessories.

Pumpkin crafts for kindergarten: owl

You will need:
Scissors
Superglue or hot glue.

1. Cut out the necessary details from felt (eyes, feathers, beak, ears and wings).
2. Using glue, carefully glue all the cut out parts. Start with different colored "feathers": glue the first row at the bottom of the pumpkin, then the second row (in a checkerboard pattern), and so on until you have covered the desired part of the pumpkin.
* You don’t need to cover the whole pumpkin; just partially glue the feathers.
3. Glue the owl's eyes, ears and wings on top of the feathers.
Pumpkin crafts (master class): decorating pumpkins with wax crayons

You will need:
White or orange pumpkin
Wax crayons
Scissors or knife
PVA glue (thick)

1. Take out the crayons and cut them in half.
2. Using glue, glue crayons (about 16 pieces of different colors) to the top of the pumpkin.

3. Once the glue is dry, use a hair dryer to melt the crayons so that the top of the pumpkin is covered in different bright colors. Do not turn on the hair dryer at full power; it is better to melt the crayons slowly and carefully.

Pumpkin crafts for school: emoticons

You will need:
Several small pumpkins
Acrylic paints
Black marker
A simple pencil.

1. Cut off the top of each pumpkin and remove the insides.
2. Using a marker or pencil, draw a circle on one side of the pumpkin - this will be the smiley face's head. You don't have to make the circle perfect.
3. Inside the circle, draw any facial expression to create a funny smiley face.
4. Think about what parts you will cut out. Some emojis can have eyes cut out, some have a mouth, and some have both.
5. Once you have cut out the pieces you need, paint the entire circle yellow. You will need to paint in several layers to make the color more saturated.

Leave the paint to dry. If you want the drying process to go faster, use a hair dryer.
6. You can add other colors depending on the emoticon. You can draw a red heart, pink tongue and/or white eyes.
7. When the paint is dry, outline all the lines with a black marker.
Video instruction:
Autumn pumpkin craft

You will need:
wide pumpkin
Autumn leaves (artificial or natural)
Floral sponge (flower oasis)
Wire (preferably floral) or tape
Floral sticks or skewers.
1. Cut the pumpkin in half and remove the insides.
2. Cut the floral sponge to fit inside the pumpkin.
3. Using wire or tape, tie several leaves together into a bunch to create a lush branch.


4. Insert the branch into the sponge.

5. Make a few more branches and insert them into the sponge to create a lush bouquet of leaves.
* If desired, you can attach cones, berries, twigs and other decorations.
Autumn craft "Pumpkin carriage"


You will need:
wide pumpkin
Small pumpkins (for wheels) or wire or cardboard
Marker or pen
thick wire
Thin wire.
1. Cut off the top of the pumpkin, remove the insides with a tablespoon and cut out the windows and door of the future carriage. You can first draw with a marker the places where the doors and windows will be.


*If desired, you can draw a design on the carriage and cut it out.

2. To make carriage wheels you can use several materials:
Cardboard
Draw 4 circles of the same size on a piece of thick cardboard and cut them out. You can draw knitting needles with a marker. Cardboard wheels can also be painted.

Small pumpkins
In addition to pumpkins, you can use other hard vegetables and fruits. These wheels look nice, but quickly deteriorate.
Wire
Making wheels from wire is more difficult, but they are durable and will last a long time. After you've woven made of wheel wire, you can wrap it in foil for beauty.


Many people love to carve and decorate pumpkins for Halloween. They make wonderful three-dimensional figures and lanterns. Or maybe you should make a fairy-tale and magical carriage from a pumpkin with your own hands for Cinderella’s toy wedding? Or use it for a fun themed photography project.
A little history
Carving crafts from pumpkins is an echo of the distant past. According to the history of the Irish people, carving began with turnips. The ancient Celts created lanterns from this vegetable to mark the onset of Samhain, the end of the harvest and the day of honoring the dead. On this holiday, October 31, the Celts placed burning coals in carved turnips to light the way for the souls of close relatives and protect themselves from evil ghosts.
When Irish immigrants arrived in America in the 1840s, they discovered that pumpkins were much easier to carve. Other ethnic groups followed suit, and the pumpkin became the fall symbol of Halloween.
How to decorate a pumpkin
The hardest part is finding or building the wheels and pieces to decorate the carriage. You can try to buy cheap wooden or plastic wheels and 3D print the carved parts. But in the end it’s much easier and cheaper to make everything yourself.
Rhinestones, beads and large beads will also decorate your homemade craft. A pumpkin carriage gives unlimited space for imagination. Cutting out crafts is a pleasant and useful way to spend leisure time with your child and enjoy the creative process yourself.
It is not necessary to follow the master classes “How to make a pumpkin carriage with your own hands” at all points. The shape (elongated upward or squat), the use of colors in the decor and your personal ideas will help you create a unique and unique masterpiece.
An example of a homemade wheel
Necessary materials:
- wire;
- model clay;
- glue;
- papier-mâché paper;
- thin wooden rods or bamboo sticks;
- dye;
- hot glue gun.

Twist the wire to form circles, two of them should have a larger diameter. Add spokes and a piece of clay to the center of the wheel to secure the design details.
Cover the resulting part with modeling clay, this will add volume. To strengthen the wheels, wrap them in paper coated with glue. After drying, paint it in the desired color.
We cut the wooden rods to the required length and paint them, then hot glue the wheels onto a bamboo stick.

An alternative method is to form the whole thing entirely out of clay and bake it.
Winter carriage
At the first master class For a do-it-yourself pumpkin carriage we will need:

Cut a circle around the stem to form a lid. Remove the pulp from the pumpkin, setting the seeds aside. Add windows and a door for the carriage and wipe down all parts of the pumpkin.
Paint the entire pumpkin and the lid and stem. This process can be entrusted to a child, because it is not too complicated. Set the piece aside until completely dry before the next step.
Apply glitter glue. In this master class for a do-it-yourself pumpkin carriage, the window and door openings are outlined. Next, attach the decorations. The child can indicate the place for them, but it is better to stick them on yourself. After finishing decorating, you need to wait so that the glue is completely dry and the jewelry does not fall off this masterpiece.
Attach the wheels with nails by piercing the small pumpkins all the way through and carefully driving them deep enough into the larger one. The tricky part is to ensure that the weight of the pumpkin is distributed evenly across all four pumpkin wheels. Light up this pumpkin by placing a candle inside.
The handmade pumpkin carriage in the photo just begs to be seen. Lighting, background and two mice complete the picture after midnight.

We will need:
- 3 belt buckles (preferably with an ornament);
- 1 large pumpkin (about 25 - 30 cm);
- marker;
- dark gray paint;
- glue, preferably in a gun for convenience;
- 1 decorative lamp or candle;
- 4 small pumpkins for wheels;
- 4 caps decorated with ornaments;
- 2 wooden or metal rods (length equal to the width of the pumpkin);
- thick wire;
- decoration instead of a stalk;
- drill.
Peel the seeds from the pumpkin, then trace the buckles you choose for the windows and door with a marker. Cut the openings to the required size, paint the fruit dark gray and secure the decorations with glue. Carefully separate the stalk and replace it with a decorated top.
In this master class for a DIY pumpkin carriage, we will need a drill. Use it to make a hole through the center of each small pumpkin. Now put them on the rod, forming an axis, and secure them at the edges by gluing the caps. Repeat the same steps for the second set of wheels.
Align the axes so they are approximately the width of the pumpkin. Carefully, without moving, tie the wire from one set of wheels to the next, forming a strong mesh for a large pumpkin. Place the “carriage” on the base and light it from the inside.
Transport for Cinderella
The secret to making a DIY pumpkin carriage master class is very simple: a little preparation, imagination and time.
We will need:
- paints of different colors;
- thin brush;
- cardboard;
- glue;
- golden paper
- decorative “fluffy” wire;
- dowels
First, you need to remove the seeds from the pumpkin and cut out an arched window. Then paint it white and use a thin brush to draw a lantern, the bottom of the carriage, the silhouette of the door and the monogram “C” (Cinderella). Set aside until paints are completely dry.
For the wheels, four circles are cut out, two of which have a slightly smaller diameter. We make duplicates from golden paper and glue them onto cardboard; add decorative wire rolled into a spiral on top.
Carefully make holes for the dowels in the pumpkin and wheels, assemble the entire structure; for greater strength, cardboard circles can be placed on glue.
Articles on the topic