Electricity repair do-it-yourself home appliances. Repair of household appliances
Modern man is surrounded by household electrical appliances and over time they break down. Published photographically illustrated examples of repairing electrical appliances, such as an electric kettle, slow cooker, iron, hair dryer, electric heater, dehumidifier, flashlight, stun gun and others, will help the home master fix them on their own.
Thanks to a detailed description of the principle of operation and the device of the listed electrical appliances, any master will be able to independently fix a malfunction that is not shown in the examples.
The electrical circuit of the electric kettle and the principle of its operation. Kettle device, overheating protection system and automatic shutdown when water boils. Power indicator and backlight device. Examples of repairing electric kettles, fixing water leaks with your own hands.
The electrical circuit of the multicooker and the principle of its operation. Multicooker device, power supply and control unit, tremoprotector. An example of repairing a multicooker with your own hands. Checking thermistors, error codes, why the display does not light up, modes are not remembered. Lid hinge repair.
The electrical circuit of the iron and the principle of its operation. The device and setting of the thermostat, tremofuse. How to check the heating element. Do-it-yourself iron repair example. How to replace the power cord. Ironing temperature for fabrics.
The device, electrical circuit of the hair dryer and the principle of its operation. External manifestation, causes and troubleshooting methods for a hair dryer. Do-it-yourself hair dryer repair examples. How to repair or replace the power cord. Repair of the spiral and thermal protection.
Electric circuits of heaters and the principle of their operation. How to disassemble the heater. Troubleshooting a heater using the example of a do-it-yourself repair. How to check the power cord, operating mode switch, heating element, position sensor, tremo fuse. Ceramic heater repair.
Electrical diagram, device and principle of operation of a condensing air dryer. Do-it-yourself dehumidifier repair example. How to check the gyrostat, tank water level sensor, fan, compressor. Check and repair of the control unit and indicators of operating modes.
The device and principle of operation of a quartz electric clock. When to change the battery. Preparing the watch for battery replacement, unscrewing the cover, removing the battery. How to check the suitability of the battery and choose a new one for replacement from the proposed table. Battery interchangeability. How to close the snap-on lid.
The article shows the electrical circuits of LED rechargeable lights, including those with charging from a household network. The principle of operation and alteration of the circuit to eliminate circuit errors are considered. Examples of repairing flashlights and replacing a regular Chinese battery with a Russian counterpart are given.
Any household appliances, which modern apartments simply abound in, is a rather complex electrical mechanism, whether it be a small coffee grinder or a serious food processor. It is for this reason that over time, failures in its operation begin to appear, various structural elements wear out. Also, the appearance of breakdowns is affected by improper storage or operation. Ultimately, almost any device can fail at the most inopportune moment. But you don’t need to get upset ahead of time, because most problems can be solved on your own, without even asking for help from specialists who require rather high fees for their services.
It is impossible to refuse the work of professional craftsmen only in two cases: the equipment is under warranty or the repair is so serious that it is impossible to do it yourself. In all other situations, you can safely repair household appliances on your own, having previously studied the main reasons for their occurrence in one or another equipment. For example, washing machines do not like too hard water, which causes plaque to form on the heating elements over time, which leads to their failure. But the most common problem is the formation of blockages in the drain system. In this case, the machine simply does not drain the water, and for repair it is necessary to disassemble several component parts and eliminate the resulting blockage.
Liquid ingress, overheating of the turbine and other similar problems can lead to the failure of almost any vacuum cleaner. These devices are also not eternal and break from time to time. But in this case, first of all, it is necessary to pay attention to the electric motor. It is with him that problems most often arise. Due to the fact that this technique is directly and constantly associated with particles of dust and dirt, sometimes it is quite enough to carry out preventive cleaning of its main elements. If this does not help, then, most likely, it remains only to replace the part that has failed.
In the case of refrigerators, everything is somewhat more complicated, but even here it is quite possible to figure out the causes of problems and how to fix them. The compressor, thermostat, relay, electronics usually fail, freon leakage is sometimes possible. Each of these breakdowns is completely removable, but, unfortunately, not every problem can be solved independently. In any case, before you go to the workshop, it makes sense to find and repair the breakdown yourself, it is possible that this process can be very simple.
To repair a chandelier with your own hands, ordinary, with several light bulbs, you must do the following: Turn off the chandelier and remove all the lamps. Check the lamps for burnout (energy-saving ones cannot be checked). If there are fuses in the design of the chandelier that protect against short circuits, they must be checked and, if necessary, replaced with new ones of the same model. Check the wiring by disconnecting the chandelier from the mains and […]
A home bread maker is a rather complicated device. But she has simple details that allow even a housewife to repair a bread machine with her own hands.
The blender is a popular kitchen item. It is an inexpensive, practical and convenient alternative to a bulky harvester. Like any device, a blender is not immune from breakdowns. The most common damages and malfunctions are: the container (glass) is leaking; grinding takes a long time or is of poor quality; several speeds do not work; damaged electrical elements (board, cord, plug).
Domestic gas work, as you know, should be performed by professionals. Especially when it comes to equipment connection issues. Some simple breakdowns that occur during the operation of the latter will not be difficult to fix on your own. It's simple, inexpensive, and time-consuming. How to fix the oven with your own hands, the question is relevant. Gas elements of stoves tend to become clogged. Masters for cleaning and other simple work […]
A home phone, despite the popularity of mobile devices, is a necessary thing. Such devices are today in most urban apartments. There are many technical solutions for home telephony. Expensive and budget phones are not eternal. They tend to break, often at the wrong time. When there is no time or opportunity to take the device to a service center, the question becomes how to fix a home […]
Sooner or later, the owners of modern kitchen sets equipped with built-in appliances have problems. Despite the fact that manufacturers prescribe a long operating period in technical data sheets, kitchen machines break down with enviable constancy.
The Japanese company Panasonic has been a recognized world leader in the production of climate equipment for many years. Its products are distinguished by high manufacturability, quality and reliability, stylish design.
Do-it-yourself multicooker repair is something that many compatriots have to face sooner or later. The main symptom that the need for repair is ripe is the low performance of the device. In other words, if it takes many times more time to cook dishes in a slow cooker than before, then this is the first signal that it’s time to think […]
Washing machines, vacuum cleaners, heaters, air conditioners, refrigerators are by no means a complete list of devices, without which the life of a modern city dweller would turn into a real hell. People just got used to doing without all this. But household appliances periodically fail, and the question arises of what to do with it. Is home appliance repair available to everyone? Let's talk about it.
What will be needed for the repair?
Of course, all electrical appliances are arranged differently. Each of them has many nodes that fail for various reasons. Accordingly, in order to fix the malfunction, you will need different tools. It may very well be that when you decide to repair an air conditioner or a washing machine, you will be forced to buy some tools.
Standard set of tools
But there is a certain set that every self-respecting owner needs, unless he is going to run to the service center because of every minor breakdown:
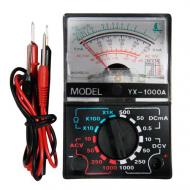
- tester (preferably a multimeter);
- a set of screwdrivers of different sizes;
- screwdriver;
- pliers;
- chisel;
- sharp knife;
- drill with nozzles.

Why is all this necessary?
- Testers are needed to determine which elements of the electrical system are out of order.
- You can buy screwdrivers separately, but there are many sets of screwdrivers of different sizes, including Phillips, on sale. So it's better to immediately buy a couple of different kits.
- The purpose of the screwdriver is clear - it is needed not only for repairing household appliances of large models, but also for fixing built-in equipment, and it will come in handy for the manufacture of all kinds of shelves and cabinets.
- You should not open the wall of the washing machine with a chisel, but in some cases you simply cannot do without this tool.
- A sharp knife is never superfluous.
- As for a drill with nozzles, it is not always needed for repairing household appliances, but it can be very useful for fixing it.
Important! In general, there are never many tools, and it is better if they are always at hand when you need to do minor or more complex repairs of household appliances with your own hands. And so that all these screwdrivers and pliers do not lie around in the most unexpected places, you can buy a special organizer for them with containers of different sizes and shapes.

What else is needed for repair?
In addition to tools, in order to start repairing household appliances with your own hands at any time, it is useful to have:
- fasteners;
- several types of glue;
- masking tape;
- marker;
- camera.
Important! Everything is clear with glue and fasteners, but why do you need a camera? And everything is very simple. Very few people know thoroughly the device of all household appliances. If you are undertaking some kind of repair for the first time, it is very important not to confuse anything during assembly and not leave unnecessary details. The location of the elements is best photographed before disconnecting, since modern digital photographic equipment makes it possible to do this without problems.
Take care of your documents!
Instructions are included with each new household appliance. It must be kept:
- If the equipment is from a reputable manufacturer, everything is written in the instructions - from the configuration to the methods of repairing used household appliances.
- When buying equipment from hand, do not forget to ask the former owners if the documentation has been preserved. This will make your life much easier when you have to change the seal, install a new heating element or do other home appliance repairs with your own hands.
Important! On the Internet, you can now find instructions for any devices, including old ones. You just have to make sure that your computer reads formats such as pdf or djvu - it is in them that technical documentation is most often saved, since such formats allow you to place not only text, but also drawings.

What is the repair of household appliances?
There are problems that anyone can fix, if only their hands grow from the right place. For example, it can be such repair of household appliances:
- put in a new battery;
- replace the heater and other components;
- change the seal;
- clear filters.
There are also breakdowns, for which it is better not to take on yourself if you do not have the appropriate knowledge and skills. For example, it is better not to repair household appliances with your own hands:
- If the touch panel has failed, it is best to contact the service center, because flashing is possible, which you can hardly do yourself.
- Some washing machines will not be able to replace the power cord without a specialist.
In general, in each specific case, it is necessary first of all to soberly assess your strengths and capabilities.

Where to get spare parts for home appliances repair?
In the salons where household appliances of a particular company are sold, there are usually accessories. So for a spare hose or a new battery, you should go there.
Why is that?
- The manufacturer may have their own standards, and components from other companies may simply not fit your device.
- The company salon employs people who deal specifically with this brand, they have probably been contacted more than once with a variety of questions on the repair of household appliances, so you can count on a consultation.
- If you have lost the instructions for your device, you can find it in the company's salon, scan it there, or, in extreme cases, take it with your camera.
Important! Components from other companies can be not only useless for your device, but even dangerous: if you have to use them, find the correspondence table.

Safety in the repair of household appliances
Having decided to take on the repair of household appliances with your own hands, think not only about putting the equipment in order, but also about your own safety:
- The device must be disconnected from the mains during repairs.
- The unit must be clean and dry.
- Some types of work when repairing household appliances are best done with gloves, or even a respirator.
- When working with acids (for example, with acetic acid), care must be taken that drops of the substance do not get into the eyes or mucous membranes.
- Tools, fasteners and in general everything that is needed for repairing household appliances must be stored in a place where small children cannot reach.
What is this all for?
- During the repair of household appliances, you disrupt the operation of the electrical circuit, a breakdown can occur anywhere. Therefore, it is necessary to unplug the plug from the socket.
- As for moisture, water is an excellent conductor, and if the circuit is broken, you can get a pretty strong electric shock.
- There may be grease on some nodes, or dirt may accumulate there. Therefore, it is better to always have gloves on hand.
- It is better to remove fasteners so that a small child cannot put a screw in his nose or swallow a nut. And for electrical appliances, an element that is accidentally out of place can become fatal.

Important! Small breakdowns that you can deal with on your own happen with gas and electric stoves. Useful tips for repairing these devices can be found in our individual reviews:
How to replace the battery in a quartz watch?
This action refers, rather, not to the repair of household appliances, but to prevention - the batteries in the watch must be changed periodically, otherwise the device will stop showing the exact time.
Important! The quartz resonator operates at a frequency of 32768 Hz. It is located on a microcircuit that looks like a drop, but in fact it is a semiconductor crystal filled with a compound with wiring.
All quartz clock circuits look the same:
- The voltage comes from a 1.5V or 3V battery to the switch.
- The switch is connected to the crown.
- The crown is pulled back - the contacts open.
- The voltage is interrupted.
- The clock stops.

When to change the battery?
For most models, the battery is designed for 1 year, for some branded watches it can work longer - three or even five years. When the battery runs out, the clock starts to fall behind. Eventually they stop.
Important! Some models have a special function that indicates that the charge is running out - the second hand starts to jump through several divisions.
Table preparation
Before you change the battery, although this is not a full-fledged repair of household appliances, you need to take care of the workplace. There are very small parts in the watch, and it is very easy to lose something. Even worse, if a foreign object gets between the teeth of the gears, and this may just be a grain.
To prevent this from happening:
- Wipe the table surface with a damp cloth.
- Spread a large white sheet of paper on it.
Important! Before work, it is better to remove the hair under a scarf or cap.

Watch preparation
Even the weakest battery lasts long enough. Over the course of a year, quite a lot of dirt can accumulate in a watch and bracelet. Replacing the battery is a great excuse to take it all out.
But first you need to remove the bracelet, which is attached to the watch with pins that easily go into the fastener tubes:
- Hook the protrusion on the pin with an awl or a thick needle.
- Dip the pin into the tube of the strap.
- Separate the bracelet from the watch
To then put the bracelet in place, you will need to do the following:
- Insert one pin of the strap into the hole of the lug and drown.
- Insert the second pin into the second hole.
- Make sure that the pins are clearly seated in the holes.
Important! Be sure to orient your watch correctly when attaching the bracelet.

We clean the watch
It is very easy to do this. It is enough to simply wipe the watch with a cloth dipped in soapy water and carefully wrung out. But the bracelet or leather strap can be washed - in the dishwasher or washing machine. Just do not forget that it must be put in a bag of cloth. As for the internal details, we covered this topic in detail in our separate article.
Opening the lid
To change the battery, you need to get inside the clock mechanism:
- Find the cover - it is on the side that comes into contact with the hand.
- Determine the mounting method.
- Remove the cover.
- Remove the battery.
- Install a new one and close the lid.
There are only four ways to attach the cover:
- on screws;
- without fasteners, due to a snug fit;
- on carving;
- with a retaining ring.
In the first case, select a screwdriver that is suitable in size and simply unscrew all the screws. When you put the cover back, tighten the screws until they stop.

To remove the snap-on cover, inspect the place where its edges meet the watch case. As a rule, a barely noticeable gap is located somewhere near the lugs for the bracelet:
- Insert a thin knife or small flat screwdriver into this slot.
- Gently press the handle, using a sharp object as a lever.
- Remove the cover. A cover put on a thread or fixed with a retaining ring just needs to be unscrewed - with pliers or a caliper.
Important! This action should be effortless.
We change the battery
First you need to remove the seal and remember how it was located. It is best to draw or photograph it. The battery itself is attached with two straps, one of which is fixed. At the same time, the movable bar is attached with a screw so that the battery does not fall out at the most inopportune moment:
- Unscrew the screw halfway, thus loosening the bar.
- Move the bar to release the battery.
- The battery should rise - there is a spring under it.
- Take a battery - best of all with plastic tweezers.
- Extract it.
- Inspect the tab of the negative contact (it is in the center of the notch).
- Check new battery (voltage).
- Remove the sticky layer from the battery.
- Put her in the nest.
- Replace and secure cover.
The easiest home appliance repair is over!

We repair the heater
Household heaters are of several types:
- electrical;
- oil;
- convection.
Any of them can break, most often this happens with electric ones, and first of all it is necessary to determine what exactly is out of order. Usually it looks simple: the heater stops heating, and, accordingly, the equipment needs to be repaired.
Important! First, check if there is voltage in the outlet. The circuit breaker at the entrance to the apartment works quite often, and the sockets periodically break.
To check the voltage at the outlet, simply plug another device into it. You can arrange a test with the help of a heater that you have doubts about - just plug it into another outlet to understand if it is out of order or the wiring.
Having found out that the outlet is in order, take care of the heater itself in order to understand what kind of household appliance repair you need. Pay attention to the position of the switches:
- Plug in the heater.
- Turn the switches to the "on" position.
- Wait a few minutes.
- If the heater does not work, you will have to disassemble it.

We carry out diagnostics
Before disassembling the system and repairing household appliances, conduct an external inspection:
- Inspect the plug with which the device is connected to the network - it must be intact, without visible defects.
- Inspect the pins of the plug - they should not hang out.
- Pay attention to the color of the pins - there should be no darkening and scorching.
- Check the integrity of the cord, especially the joints with the plug and body.
- Look through the holes in the panel to see if there are any torn or burnt ones.
- Pay attention to whether there are visible mechanical damages on the heating element - this is usually visible through the holes.
- After making sure that there is no visible damage, take a tester or multimeter and set it to low resistance.
- Check the power cord at the junction with the plug by setting the device switch to the operating position, and attach the ohmmeter probes to the plug pins.
- Shake the cord from side to side, watching the tester - the slightest deviation of the arrow indicates that the defect is in this place.
- Replace plug.

Heater - inside view
It is possible that the device will still have to be disassembled. To do this, you need to know how it works and on what principle it works.
Important! The easiest option is when the cord with the plug is connected directly to the heating element. A more complicated option - between the cord and the heater there is a block with terminals, they are connected by thread or captive terminals.
Most household heaters have a more complex circuit, it also has a switch. There may also be an option when a fuse is added to the circuit, the task of which is to open the circuit when overheated. There may also be a sensor that is connected in series with a fuse.
Finally, you may come across a circuit with two heating elements and an additional switch. But in any case, the device is not particularly complicated, and it will not be difficult to deal with the elements.
Important! The situation with the fan heater is somewhat worse. He has a motor with an impeller, respectively - an additional switch. In expensive models, there may be other “bells and whistles”, such as a temperature controller, all kinds of indicators, etc.

We disassemble the heater
Start disassembling for the repair of household appliances should be from the place where the power cord enters the case:
- Unscrew all the screws that you can see on the side panel.
- Loosen the hidden screws by removing the decorative cover.
- Open the screw hole that connects the heater cover and base. Unscrew another hidden screw - it may be under the seal.
- After removing the side cover, inspect the wires.
- Check all elements with a tester.
Checking the cord
The wire for modern heaters is three-core, painted in blue, red and yellow-green:
- Set the tester to resistance measurement mode.
- Connect one probe to the plug pin, the second - touch the green and red wires in turn: in one case, the resistance should be zero.
- Check the second pin and the second wire in the same way.
- If the wire is in order, measure the resistance between the common terminal and the rest, it should be zero.
- Check the thermostat by touching the tester probe to the terminals and turning the knob - the resistance should be zero.
Important! If the thermostat gives any other resistance, remove it by unscrewing the two screws. Heating elements are tested by measuring the resistance between wires. You should also check the fuse, if there is one.

Changing details
Having found out the cause of the malfunction, decide what to do with the failed element. The best way out is to replace, fortunately, there are no problems with this. In each company store you will find accessories, and if not, you can order the necessary parts via the Internet.
Important! Before removing parts, do not forget to sketch or photograph their position, especially if you are repairing household appliances for the first time. The sequence of parsing is best written down - you will have to assemble the heater in the reverse order.
We repair the iron
There is a lot in common in the design of all heating devices. In this sense, repairing an iron is not much different from repairing a heater.
And in our separate review you will find out.
Diagnostics
The scheme differs slightly, respectively - you will have to act in a similar way:
- First, check the condition of the wiring and sockets.
- Examine the iron. Just like with a heater, start with a cord and plug. The plug must be absolutely intact, its pins must sit tightly and not hang out, and the screw must be tightened to the stop. Burn marks are not allowed. The cord must be completely intact.
- Check terminal contacts. It is best to replace a defective power cord. Of course, you can wrap it with electrical tape, but this is a temporary measure, and unsafe.

It will not be possible to look inside the iron, there are no perforations or meshes in this case. Therefore, if the cord and plug are in order, and the unit does not work, you will have to disassemble it.
Where to start? There are few options. You will only find a few screws on the back where the cord attaches. They must be unscrewed in order to make repairs.
Important! Not every iron can be disassembled. If this does not work, the device will have to be changed completely.
What can be repaired?
The most common breakdowns are the oxidation of the thermostat contacts and the health of the fuse:
- If the heating element fails, you will have to part with the iron. It is unlikely that it will be possible to extract it from the sole - unless, of course, you have an antediluvian grandfather iron, that one can be easily disassembled.
- And the thermostat can be easily changed.

We repair the kettle
Not every modern kettle can be repaired simply because some models cannot be disassembled.
Important! To find out if your kettle is repairable, look at the bottom of the kettle. If you find at least one screw, the kettle can be disassembled.
A kettle is also a heater, only it is arranged a little differently than an iron:
- The main part is the heating element, like all heating devices.
- Power is supplied to the connector located in the stand.
- The kettle is connected to the stand through a connector.
- In the vessel itself, in addition to the heating element, there is a switch, an indicator light (for some models) and a thermoelectric relay.
Important! When the kettle is placed on the stand and the switch is turned on, the circuit closes, the indicator lights up. When the water warms up to a temperature of 100 ° C and boils, the thermal relay is activated, and the circuit opens. If the kettle is faulty, first you need to look for damage to the circuits that supply voltage to the heating element.

Important! The most important source of all troubles with household appliances is scale. Proper maintenance of equipment can extend its life. And what is most convenient, you won’t have to spend a lot of time and money for this if you take note of the methods we have proposed.
Where is repair needed?
As with the heater, repairs may be required:
- in a cord;
- in the socket;
- in a fork;
- in socket.
Repair of such household appliances, which you can do yourself, usually comes down to repairing the cord. The wire is checked in the same way as for a heater or iron.
If the connecting circuits, switch or thermal relay are damaged, the device must be disassembled. This is not always possible:
- If the case is not separable, repair should be discarded.
- If the case is collapsible:
- Loosen the screws.
- Ring the circuits and the switch in the same way as you did with the heater.
- Electrically conductive circuits can be restored - soldered or stripped contacts, correct the switch spring, etc.
Modern man is surrounded by household electrical appliances and over time they break down. Published photographically illustrated examples of repairing electrical appliances, such as an electric kettle, slow cooker, iron, hair dryer, electric heater, dehumidifier, flashlight, stun gun and others, will help the home master fix them on their own.
Thanks to a detailed description of the principle of operation and the device of the listed electrical appliances, any master will be able to independently fix a malfunction that is not shown in the examples.
The electrical circuit of the electric kettle and the principle of its operation. Kettle device, overheating protection system and automatic shutdown when water boils. Power indicator and backlight device. Examples of repairing electric kettles, fixing water leaks with your own hands.
The electrical circuit of the multicooker and the principle of its operation. Multicooker device, power supply and control unit, tremoprotector. An example of repairing a multicooker with your own hands. Checking thermistors, error codes, why the display does not light up, modes are not remembered. Lid hinge repair.
The electrical circuit of the iron and the principle of its operation. The device and setting of the thermostat, tremofuse. How to check the heating element. Do-it-yourself iron repair example. How to replace the power cord. Ironing temperature for fabrics.
The device, electrical circuit of the hair dryer and the principle of its operation. External manifestation, causes and troubleshooting methods for a hair dryer. Do-it-yourself hair dryer repair examples. How to repair or replace the power cord. Repair of the spiral and thermal protection.
Electric circuits of heaters and the principle of their operation. How to disassemble the heater. Troubleshooting a heater using the example of a do-it-yourself repair. How to check the power cord, operating mode switch, heating element, position sensor, tremo fuse. Ceramic heater repair.
Electrical diagram, device and principle of operation of a condensing air dryer. Do-it-yourself dehumidifier repair example. How to check the gyrostat, tank water level sensor, fan, compressor. Check and repair of the control unit and indicators of operating modes.
The device and principle of operation of a quartz electric clock. When to change the battery. Preparing the watch for battery replacement, unscrewing the cover, removing the battery. How to check the suitability of the battery and choose a new one for replacement from the proposed table. Battery interchangeability. How to close the snap-on lid.
The article shows the electrical circuits of LED rechargeable lights, including those with charging from a household network. The principle of operation and alteration of the circuit to eliminate circuit errors are considered. Examples of repairing flashlights and replacing a regular Chinese battery with a Russian counterpart are given.
The electronic modules of washing machines are the most complex parts of this household appliance. They are based on a printed circuit board, on which the controls for each unit of the washing machine and its parts are located in a special order. Synchronizes the work of the elements of the microprocessor - the most expensive part of the control module. The electronic modules of modern washing machines can break down, and this is where the main problems begin. In the framework of the article, we will discuss these problems and outline ways to resolve them.
How to understand that the module is broken?
The most basic problem is to understand whether the control module is really broken and needs repair, or whether one of the units of the washing machine has actually broken, and it is this that creates the appearance of damage to the electronics. The resolution of this issue is of priority, because if you immediately start repairing or changing the module without sufficient reason, you will throw money away, and the problem will not be solved. 
Therefore, to begin with, let's figure out how to diagnose a problem with an electronic module? Let's start with a simple one - we will study the typical signs of a breakdown of an electronic module. In about half of the cases, the electronic modules of modern washing machines give out the cause of the malfunction with their “behavior”. We just have to recognize and identify it.
- , while the control panel freezes, and it does not respond to user actions, the error code is not displayed on the display.
- All the lights on the control panel flash all together and alternately, while it is not possible to start any washing program.
- The washing program is set and started, while water is either not drawn into the tank, or the water is immediately drained, and after that the machine freezes “tightly”, only a reboot saves. In this case, after restarting, washing can be carried out in normal mode.
- The machine with any washing program erases 3-4 hours in a row without stopping, without switching to the rinse and spin mode. The drain pump does not attempt to remove water from the tank. After a long time, the machine freezes.
- After turning on when trying to set the washing program, the machine freezes and immediately turns off.
- The washing program is set, the washing progress is displayed on the display, but in fact nothing happens, water is not poured into the tank, the drum does not spin - nothing happens.
- The motor changes the drum speed unnecessarily often, even if the change in speed is not due to the program. The drum rotates alternately and for a very long time in one direction, then in the other.
- The heating element of the washing machine sometimes overheats the water, then leaves it cold, ignoring the readings of the temperature sensor.
Important! The indicated behavior of the washing machine only hints at a malfunction and future repair of the electronic module. To be sure, you need to conduct a series of tests.
 Each of the above eight signs of breakdowns can indicate both a malfunction of the control module and a malfunction of one of the sensors or the washing machine unit. To verify that this is indeed an electronic module, you must first run the automatic test of the washing machine, and then test the units of the machine manually. Only then can final conclusions about the malfunction be made. So, how to do a washing machine autotest?
On different models of washing machines, the autotest is done in different ways. Therefore, we recommend that you carefully read the instruction manual for your model of automatic washing machine. Let's give an example of autotesting using the Ardo washing machine as an example.
- We translate the arrow of the programmer into a strictly vertical position, so that the arrow is pointing down.
- Set the temperature to zero.
- We check that the drum is empty and there is no water in the tank.
- We press all the buttons on the control panel at the same time, after which the auto-test mode of the machine should start.
Upon completion of the test, the display should show an error code corresponding to either a malfunction of the washing machine unit or a malfunction of the electronic module.
Note! The test cannot be carried out in washing machines in which an asynchronous motor is installed, or on ultra-modern machines with a built-in self-diagnosis system (there is a special button on the “self-diagnosis” panel).
Autotest does not give an adequate result in all cases. To make sure that the electronic module is malfunctioning, you need to ring it with a multimeter. The same must be done with all suspicious units by ringing them one by one. The work, of course, is very painstaking, but this is the only way to be 100% sure that the electronic module is malfunctioning. 
Why does the control module break?
There are a lot of reasons for the breakdown of the electronic module. And not all reasons are due to improper operation of the washing machine. But first things first.
- Factory defect: one of the parts of the board or track is damaged.
- Ingress of moisture, work in conditions of very high humidity.
- Voltage fluctuations.
- Disconnecting the washing machine from the mains several times during the washing program.
Factory marriage, unfortunately, is typical for both cheap and expensive washing machines.
Most often, such a marriage occurs in the most difficult part of the washing machine - in the control unit. Fortunately, in most cases the problem is detected in a short time, when the machine is still under warranty, but sometimes the problem manifests itself only after a few years. In this case, repairs have to be carried out at their own expense and often with their own hands.
Any automatic washing machine is designed in such a way to work in very harsh environmental conditions, especially high humidity. Nevertheless, in some cases, it is moisture that causes the failure of the electronic module. Basically, moisture becomes the cause of a short circuit that disables the electrician and electronics. After that, the machine will definitely need serious repairs. 
If you connect the washing machine to a "defenseless" power supply, a voltage drop may well burn out any unit of the washing machine or all units together, including the electronic module. This can be avoided by including a difavtomat in the electrical communications that feed the washing machine.
And finally, the user factor. Never turn off the washing machine during operation from the mains forcibly. Several such shutdowns may well disable the electronic module. If you urgently need to turn off the washing machine, it is better to press the stop, and only then turn it off - this will be less harmful than a sudden shutdown.
We fix it ourselves or call the master: what is more profitable?
Now let's move on to the main question, is it worth doing the repair of the electronic module on your own or is it better to entrust this responsible matter to specialists? It is rather difficult to answer this question. Everything will depend on your knowledge, skills and abilities to work with microcircuits and printed circuit boards, as well as on the nature of the breakdown. 
The most basic problem of an amateur is the definition of a breakdown in an electronic module. Each detail needs to be called, a burnt element or a broken track must be determined, and only then the element should be replaced or the track soldered. The likelihood that you will do everything right, with mediocre skills, tend to zero.
Of course, it is possible to replace the electronic components of modern washing machines, but this will not work, especially if high-quality diagnostics have not been carried out. A new electronics board will most likely burn out again.
There is another option - to remove the entire control unit and give it to the master for testing. This is not recommended by experts. If you already invite the master, then you need to give him the opportunity to call and check the control unit in place, right on the washing machine. So he is able to determine the problem more precisely.
Important! The electronic modules of modern washing machines can only be repaired by qualified craftsmen, do not trust repairs to just anyone, be interested in the recommendations of a specialist before entrusting him with work.
Whatever one may say, it is more profitable to turn to a specialist. Do-it-yourself repair of such a complex element of a washing machine can lead to even higher costs. In the worst case, when conducting an incorrect equipment test, you can burn not only the control unit, but also the heater, engine, drain pump, or all at the same time - you have to buy a new car. This raises the question - why take risks, is it not better to entrust the repair of your home assistant to a good master?
Related Articles