Product technology project. Creative project on technology
The word “project” (from the Latin projectus – thrown forward, advanced) means “action plan”, “intention”, “proposal”. A project is a prototype, an ideal image of a proposed or possible object or state. An educational creative project should be understood as an independently developed and manufactured product from an idea to its implementation, which has subjective or objective novelty and is carried out under the supervision and consultation of a teacher. A project may consist of separate parts, for example: drawings, drawings for the manufacture of a product or the development of a technological process. It may contain calculations, research results, economic calculations. The project should also aim to produce something new that meets human needs. Completing the project contributes to the development of aesthetic taste, initiative, and logical thinking.
Educational creative project on technology - this is an independently developed and manufactured product from the idea to its implementation, made with the consulting participation of the teacher.
In the process of completing project assignments, students must solve the following tasks, which will, of course, have different levels of success depending on gender, age and individual characteristics. These include the meaningful execution of the following mental and practical actions:
– understanding the statement of the task, the essence of the educational task, the nature of interaction with peers and teachers, the requirements for presenting completed work or its parts;
– planning the final result and presenting it in verbal form, i.e. without limiting the imagination of the student, they must give themselves and others a detailed answer according to the scheme: “I would like...”;
– action planning, i.e. determining their sequence with approximate estimates of time spent on stages, managing the budget of time, effort, and funds;
– execution of an approximate design algorithm;
– making adjustments to previously made decisions;
– constructive discussion of the results and problems of the design stages, formation of constructive questions for the teacher, help, advice, additional information, etc.;
– expression of ideas, design solutions using technical drawings, diagrams, sketches, drawings, layouts;
– independent search and finding of necessary information;
– drawing up a diagram of the necessary calculations - constructive, technological, economic, presenting them in verbal form;
– evaluation of the result based on the achievement of what was planned, on the volume and quality of what was completed, on labor costs, on novelty;
– evaluating projects completed by others;
– understanding of the criteria for evaluating projects and their protection, the procedure for public protection of projects.
Project options can be very different. It is not necessary that you complete the entire project, especially a complex one, yourself. Part of the project can be already completed or carried out by a friend, parents, or teacher. You can complete the project together with your classmates, but at the same time divide it into parts, distributing responsibility for each of them.
The goal of any project is to create a new, effective, competitive and environmentally friendly product that meets human needs. These can be various types of products or services.
The creative project is an independent final work on the subject “Technology and Labor Training”. It shows how strong the skills, knowledge and abilities of the student that he acquired in technology lessons are. In addition, a creative project allows the student to demonstrate individuality, as well as their own ability to use all acquired knowledge in practice.
In this section of our website you will find an abundance of creative technology projects, among which you will be sure to choose one that is interesting and accessible to you. With the help of the project, you can create new models using the material at hand. All presented projects are aimed at producing new competitive products that meet human needs and are also in demand among modern buyers.
What are the benefits of completing the project?
The implementation of projects presented on our website contributes to the development of:
- aesthetic taste;
- creative abilities;
- logical thinking in the field of project activities;
- logic.
Students will use the item obtained as a result of the completed project in practice, that is, use the product in their daily lives. In addition, students have the opportunity to independently evaluate the work done, as well as feel satisfaction from the result obtained through their own efforts.
How to choose a project?
When choosing, be guided by your own preferences and the availability of materials and tools necessary for the work.
In the economic part, it will be necessary to calculate the costs of the product. The technological part describes the production process. The presented projects are created in such detail that you will not have any problems during their implementation!
Slide 1
Author: Murnukova Svetlana Anatolyevna Place of work, position: MAOU interschool educational center of Kaliningrad, teacher of technology 1st category CREATIVE PROJECT 5th gradeSlide 2
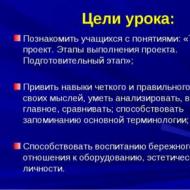
 Lesson objectives: To introduce students to the concepts: “Creative project. Stages of project implementation. Preparatory stage"; Instill the skills of clear and correct expression of your thoughts, be able to analyze, highlight the main thing, and compare; promote memorization of basic terminology; To promote a caring attitude towards equipment and aesthetic qualities of the individual.
Slide 3

Slide 4
 Creativity comes from the word “to create” and means “to search, invent and create something that has not been encountered in past experience.” Creativity is the process of creating something new and beautiful, which fills life with joy, stimulates the need for knowledge, and enhances the work of thought.
Slide 5
 A creative project is an independent final work, as a result of which a useful product with novelty is created. For example, mastering new methods of processing or finishing a material, developing an original design or shape of a product, etc.
Slide 6
 The goal of any creative project is to transform the reality around a person.
Slide 7
 Stages and content of the project Stages Content 1 Preparatory Selection and justification of the project topic. Historical and technical information 2 Design Development of design documentation (drawings, models, sketches, diagrams, drawings, etc.) 3 Technological Development of technological documentation (technological map or product manufacturing plan) 4 Manufacturing of the product Organization of the workplace. Performing technological operations 5 Final Economic justification. Product brochure. Conclusions based on the results of the work. Project protection
Slide 8
 Work on the project can be carried out individually or collectively (2-3 people). This specifically defines what each student does. When designing a product, you can use ready-made parts and mechanisms.
Slide 9

Slide 10

Slide 11
 Requirements for choosing a project topic: the essence of the work to be done should be clear; the work should be interesting; you must be able to independently perform basic technological operations during the project; the material and technical base must ensure the implementation of the project.
Slide 12
 Historical information - a short study on the history of the design object. This certificate indicates: the time and place of origin of the design object (if any); the history of its development and application (local history material); features of manufacturing technology; traditions of production and use.
Slide 13

Slide 14
 The technical certificate indicates: tools and materials necessary for the manufacture of the design object; shape, color, size and other parameters of the product; traditions in decoration (in drawings, composition, technological techniques); a brief description of technological methods (symbols, diagrams, illustrations, drawings); types and methods of finishing products.
Slide 15
 Questions and tasks Define creativity. What is a creative project? What is the purpose of a creative project? List the main design stages. * The student completed a project - a “Chicken” panel made of three-layer plywood, and the quality of the work was excellent. The souvenir picture came out beautiful and everyone liked it. The student took the shape and design of the panel from a school textbook. The progress report was also submitted in a timely manner. While working, the student diligently completed all tasks, observed occupational safety precautions, correctly applied the acquired work techniques, and kept order in the workplace. Do you think his work is creative?
Slide 16
 Questions and tasks What does the preparatory stage include? What does the concept of “project justification” mean? Tell us about the content of the historical reference. What information must be included in the technical certificate? List the main sources of information. *What sources of information did you use to complete your project?
Slide 17
 NEW CONCEPTS Creativity, creative project, Design stages Preparatory stage, Justification of the project, Historical background, Information, Sources of information, Technical information.
Municipal educational institution
« Secondary school No. 17"
Creative project on technology on the topic:
Completed by: 7th grade student
Golysheva Kristina
Head: technology teacher
O. V. Grechishkina
Bogoroditsk 2016
TABLE OF CONTENTS
Introduction…………………………………………………………………….3
Goals and objectives of the project…………………………………………….. 3
Justification for choosing the project topic…………………………………. 3
Product options……………………………………………………. 4
Main part………………………………………………………. . 5
2.1 History of embroidery with satin ribbons…………………………… 5
2.2 Selection of materials and tools and safety precautions……… 6
2.3 Product sketch……………………………………………………….. 8
2.4 Product manufacturing technology………………………………….. .9
2.5 Environmental assessment of the project…………………………………….10
2.6 Economic assessment of the project……………………………………11
3 Conclusion……………………………………………………………………………… 12
3.1 Self-esteem…………………………………………………………..... 13
3.2 Results of the work………………………………………………………. 13
5 Literature……………………………………………………………..15
INTRODUCTION
GOALS AND OBJECTIVES OF THE PROJECT
Purpose a creative project is the implementation of a product that most fully represents my knowledge, skills, and abilities acquired during the learning process in technology lessons.
Tasks project:
1. Develop and implement the project.
2. Make a painting according to the project.
3. Improve the skills and techniques learned in technology lessons.
4. Evaluate the work done.
RATIONALE FOR CHOOSING THE PROJECT TOPIC
In our house there are things embroidered and decorated by my grandmother and great-grandmother. These are paintings, towels, napkins.
Beautiful products still keep the warmth of their hands and hearts, and at one time they were a fabulous decoration for a simple village house.
Even as a child, looking at these products, I dreamed of becoming a needlewoman like them. Therefore, for me, the ability to embroider is an opportunity to become familiar with beauty.
I learned this skill from my grandmother, and now I really want to use it to decorate my home. My mom's birthday is coming soon. I decided to give her a gift. She has a small shelf in her room. In this place, I decided to make her a bright picture. I think it will decorate the interior of her room. After all, the best gift for parents is the one made with their own hands.
I know that today in all countries interest in embroidery is being revived, a lot of relevant literature is being published: books, magazines, manuals. Embroidery gives very great opportunities to make any decorative product. Currently, embroidery with satin ribbons is popular. I decided to take up this art.
PRODUCT OPTIONS
Option #1. Making a painting using the technique of hand embroidery with ribbons. Yes, I can do it, there are no problems...materially, but it takes a lot of time. I have little mastered this technique of work.

Option #2. Making a picture embroidered with beads. It is suitable for interior decoration, but it is too simple.

Option #3. A picture made with satin ribbons is a good idea! It can be made from satin ribbons and placed in a frame. I have no doubt about the need for such a painting, because it will decorate the interior of the apartment. It won’t take very much time to make a painting, but it will bring so much beauty and comfort to the interior of the house. So I made my choice! I decided to “paint” the picture myself with ribbons. We'll see what comes of it at the end!
MAIN PART
2.1 HISTORY OF SATIN RIBBON EMBROIDERY
Since ancient times, narrow strips of fabric have been used in everyday life and economic activities of people. Already in Ancient Greece, women wove strips of fabric into their hair to “revive” their image.
Headbands decorated with gold and precious stones were woven into hair in ancient Rome.
In addition, clothing was trimmed with colored ribbons, and each social class had its own color and material. In the Middle Ages in Italy, the backs of chairs and canopies were already decorated with ribbons, and heavy curtains were also tied up to cover windows and protect against the cold in winter.
But only inXIVcentury, the household use of silk ribbons began to expand. The weaving traditions in Lyon and the favorable climatic conditions of southern Europe contributed to the rapid development of the production of valuable silk thread. After the papal curia moved to Avignon, under the tutelage of the French king, noble gentlemen began to flaunt in luxurious clothes, trimmed with ribbons with a gold border or brocade ribbons, according to the rank and origin of the wearer.
In 1446, the future King LouisXIinvited Italian weavers to teach their art to the residents of Lyon. Nothing came of this venture, but various machines were brought to the city both for making silk and for making silk ribbons. The demand for ribbons continued to grow, and Lyon gradually became a major textile center. In 1560, there were already fifty thousand weavers who made various, including expensive and extravagant, silk ribbons, and further south, in Velzy and Saint-Etienne and the surrounding area, there were already about eighty
Thousands of looms for the production of ribbons and three hundred and seventy - for the production of braided products (braid, braid, basson). At firstXVIIIcentury, the demand for these goods increased sharply, and a period of rapid distribution of luxurious and beautiful ribbons began. King Louis of FranceXIVhe decorated even his shoes with ribbons and precious stones and ordered the court to dress in an original and creative way.
The Rococo era arrived, and frivolity became the style of the French court. King LouisXVHe loved to embroider and often gave the ladies of the court lovely trinkets he made himself. Dresses became voluminous and spacious, richly decorated with ribbons. “Flying dresses” with unstitched pleats (tucks) on the chest and numerous ribbons came into fashion.
It was during these times that embroidery with silk ribbons appeared in France. At first, noble ladies began to decorate their dresses, decorating the corsages with small roses “a la rococo”, leaves and many scattered flowers with pearls and crystals.
Then it was time for the laundry. It became more and more luxurious and sophisticated. In the ateliers, which bore the high title of “Suppliers of the Royal Court,” real masterpieces were created using a simple needle and ribbons. Now they are displayed in museum showcases around the world - from London to Pretoria.
From France, this type of embroidery migrated to the islands, to England. And from there it spread to all countries of the former British Empire. Together with settlers from the Old World, he came to America, where he quickly gained popularity. This art flourished in the 70sXIXcenturies. By this time, embroidery could be seen not only on dresses, but also on umbrellas, lampshades, quilts, household trinkets and hats.
After World War II, public interest in all types of handicrafts began to decline. But over the past two decades, a revival of embroidery has begun.
Interest returned, and this art again shone with all its facets. After all, sewing with silk ribbons is extremely entertaining; it does not require complex devices or large upfront costs. In addition, simple and well-known embroidery techniques are used here. And the three-dimensional design is so attractive that one can, without any doubt, say: in the coming years, this type of embroidery will become widespread and successful.
2.2 SELECTION OF MATERIALS AND TOOLS
Needles
Different needles are used for embroidery: thin - for light fabrics, thick - for dense ones. When sewing with silk ribbon, sharp needles are used, because they must fit freely into the fabric without forming unsightly puffs. The eye of the needle should be elongated so that you can easily see the tape and it slides along it without twisting. In this way, possible ruptures can be avoided. For tapes with a width of 7, 9, 12 mm, needles No. 18 - 22 are selected; for tape 3 mm, No. 24 is recommended.
Ribbons
Decorative ribbons are used for finishing only.Silk ribbons . They come in different widths and different colors. They can be used for embroidery on any type of fabric.Organza ribbons and braid used in embroidery to create volume and transparency.Finishing tapes and braid There are several types: voile ribbon (with heel, smooth or with a satin insert in the center), satin ribbon (smooth, gathered, pleated), lace ribbon (with beads, gathered).
Embroidery threads
They are required to create a base (outline) for some seams or to secure the tape on the wrong side at the end of the work.
Beads and seed beads
They are used for decoration and give embroidery a special grace.
Fabrics
For the base when embroidering with silk ribbon, you can use a wide variety of fabrics. Cotton fabrics: matting, cambric, plisse, muslin, satin. Linen fabrics: rough linen, thin linen, rough linen, linen fabric with a uniform base. Silk fabrics: chiffon, chesucha, silk tulle. Woolen fabrics: crepe, tweed, jersey. You can embroider on any surface, as long as the fabric is so strong that the stitches are securely held on it, and so elastic that the thread passes through it easily.
In my job The following materials and tools were used:
Fabric for background (light gray canvas)
Satin ribbons
Cotton threads
Needle
Scissors

Safety precautions
While working with scissors
When working, place the scissors on the right, with the rings facing you, so as not to prick yourself on their sharp ends. The blades of the scissors must be closed when not in use.
Pass in rings forward with ends closed.
Make sure that the scissors do not fall on the floor, as if they fall, they can injure you and your friend.
Do not play with scissors or put them in your mouth.
While working with needles
Store pins and needles in a certain place (cushion, special box, etc.), and do not leave them at the workplace.
Do not use rusty needles and pins when working, as they break easily.
Do not put needles or pins in your mouth under any circumstances.
During work, do not stick needles into clothing or random objects.
Sew with needles only with a thimble to avoid pricking your finger.
Attach patterns and fabrics with the sharp ends of pins facing away from you.
Do not bite the threads with your teeth, but cut them with scissors.
While working with glue
Place the glue gun on the thermal mat.
Insert a roll of glue into the gun and secure it.
Plug the plug into the socket.
Children should not work with hot glue. Do the work with the help of adults.
Upon completion of work, unplug the plug from the socket, cool and put the gun away.
2.3 PRODUCT SKETCH

2 .4 PRODUCT MANUFACTURING TECHNOLOGY
№p/p
Manufacturing sequence
Materials, tools
Transfer the design composition onto fabric
fabric, pencil, painting sketch
Make flowers of different colors from satin ribbons. Only 25 pieces. The technology for making flowers is shown below.
Attach a bead to the middle of the flower.
ready-made flowers, threads, needle, scissors
Make 8 large flowers from satin ribbons. The manufacturing technology is shown below.
satin ribbons, threads, needle, scissors
Tuck the fabric into the frame. Attach flowers and leaves to the background randomly.
ready-made flowers, leaves, fabric for background, needle, scissors, threads
Place the finished picture in a frame.
picture, frame
Making flowers.
To make each small flower, I sewed small basting stitches on the ribbon, as shown indrawing and tightened it. A flower has formed. This way I made several flowers of different colors and sizes.


As many flowers as we want, we collect so many pieces of 25 cm for large flowers, 15 cm for medium ones, 10 cm for small ones.
Now you can cut the ribbon to the desired length, leaving a little space for the seam after the last stitch.
Now we carefully pull the thread and collect our flowers.

I didn't have a specific manufacturing plan. I began to collect the bouquet randomly, “as it fell”... I used the selection and combination of colors. First I made a bow from a thin brown ribbon. Then she began to collect a pattern of flowers.

We had to move the flowers from one place to another to find a harmonious combination.

After the final placement of the flowers on the canvas, I moved on to the final stage - gluing the flowers to the frame. I took one flower at a time from the formed pattern, squeezed out a drop of hot glue and quickly applied it to the intended place. I secured the ribbon-twigs at the ends and glued on a bow. There you go.
2.5 ENVIRONMENTAL ASSESSMENT OF THE PROJECT
Embroiderysatin ribbons- it's ecologsical clean production, because it is practically waste-free, no harmful substances are released, the atmosphere is not polluted, and there is no danger to human health.
2.6 ECONOMIC ASSESSMENT OF THE PROJECT
Price per1 m/1 piece
Consumption
Total RUR
1
Fabric for background canvas
150 rub.
30*20
150 rub.
2
Satin ribbons: green
10 rub.
1 m
10 rub.
3
Satin ribbons:blue
10 rub.
0.5 m
5 rub.
4
Satin ribbons:raspberry
10 rub.
1m
10 rub.
5
Satin ribbons:red
10 rub.
0.5 m
5 rub.
6
Satin ribbons:dark green
10 rub.
0.5 m
5 rub.
7
Satin ribbons:brown
10 rub.
1m
10 rub.
8
Satin ribbons: yellow
10 rub.
1 m
10 rub.
9
Frame 24*19
125 rub.
1 PC.
125 rub.
10
Needle
was
1 PC.
11
Cotton threads
were
1 PC.
12
Scissors
were
1 PC.
13
Hot glue
15 rub.
1 PC.
15 rub.
Total:
345 rub.
The cost of my painting is low, which means that it is economically cheaper to do the work yourself than to buy a similar one at the market or in a store.
CONCLUSION
3.1 SELF-ASSESSMENT
The completed painting turned out to be very bright and beautiful, the patterns of the drawing are simple, they correspond to the interior of the room.
All my family liked the picture. I hung it above my bed. The room became cozier and more beautiful.
RESULTS OF THE WORK
Analyzing the work performed, I believe that I fulfilled the goal and objectives set for myself.
In the process of performing creative work, I consolidated the skills to correctly and beautifully perform embroidery with satin ribbons and select colors. I enjoyed doing this work, it was a creative, fun process that resulted in a wonderful product. While carrying out a creative project, I learned a lot about the history of embroidery with satin ribbons and systematized my knowledge and skills. I will continue to improve in this type of arts and crafts.

4. Product advertising
The hands of people can make any miracle;
And flowers can be woven across a white field
And embroider a golden sun across the blue sky,
So that there is more beauty on earth
I'll pick up a thread and a simple rag
And a little fantasy and magic
And I’ll sew something that you can’t even dream of -
Only so that beauty lives on earth!

LITERATURE
1. A. Burda. "Album on handicrafts." M.1999.
2. “Embroidery school” series “Ribbon embroidery”. M. 2004.
3. “Golden Library of Hobbies” Embroidery with silk ribbons. M. "Ast-Press". 2008.
A. Chernova “The Art of Ribbon Embroidery” 2006 Rostov-on-Don “Phoenix”.
D. Ciotti “Embroidery with silk ribbons” 2004 Moscow “Ast-press”.
https://yandex.ru/images/search?text=%D1%82%D0%B2%D0%BE%D1%80%D1%87%D0%B5%D1%81%D0%BA%D0%B8 %D0%B5%20%D0%BF%D1%80%D0%BE%D0%B5%D0%BA%D1%82%D1%8B%20%D0%BF%D0%BE%20%D1%82 %D0%B5%D1%85%D0%BD%D0%BE%D0%BB%D0%BE%D0%B3%D0%B8%D0%B8%20%D0%B2%D1%8B%D1%88 %D0%B8%D0%B2%D0%BA%D0%B0%20%D0%BB%D0%B5%D0%BD%D1%82%D0%B0%D0%BC%D0%B8&noreask=1&lr=213
Slide 1
Creative project using the “Bouquet of Joy” technology Completed by: Anufrieva Svetlana Baykova Victoria, 10th grade student Supervisor: Domikova V.A. technology teacher in the village of Verkhnyaya Trinity, 2011Slide 2
 Project components 1.Identification of need. Problem formulation (Rationale for choosing a topic). 2.The history of the origin of ribbon embroidery. 3. A set of initial ideas. 4. Development of one or more best ideas for the interior. - The product is in the form of a sketch or picture. -Place of manufacture. Production time. -Selection of tools and devices. 5. Manufacturing of the product - Drawing up criteria for the future product. -Technological map of product manufacturing. In the process of creating a product, exercises are performed that teach certain skills and abilities. -Analysis of ideas and selection of the best options -Economic justification. -Ecological justification. -Product advertising. 6. Conclusion. -Self-assessment of the product, whether it meets the criteria. -Assessment of your activities during design. 7. Bibliography.
Slide 3
 1.Identification of need (justification for choosing a topic) We love interesting handmade products. Handmade is always beautiful and valuable. At the end of 10th grade, we wanted to complete our product and prepare a report. We decided to do embroidery with satin ribbons as a gift for the class. Embroidery with satin ribbons is unusual, original and beautiful. We are attracted to embroidery with satin ribbons by its simplicity and availability of materials. Embroidery is a very interesting and exciting activity and is possible not only on canvas but also on fabric.
Slide 4
 2. History. If you tie a ribbon around the simplest box, it will become a GIFT! If you tie ribbons to any car, everyone will immediately understand that it is going to the HOLIDAY! And how a ribbon woven into her hairstyle decorates a girl or a woman... The ancestor of silk stripes was a rope made from plant fibers: having first turned into braid, it waited for the invention of the loom and became an exquisite ribbon. The ribbon is a symbol of holiday, celebration!
Slide 5
 3. A set of initial ideas. After working through all the options, we decided to make product number 6.
Slide 6
 4. Development of one or more best ideas for the interior. A product in the form of a sketch or picture. -Place of manufacture. Production time. Service labor workshop of M.I. Kalinin Secondary School The product was designed from September to May 2011
Slide 7
 -Selection of materials, tools and devices. Materials and tools for making a painting. 1.Synthetic fabric. 2. Colored ribbons 3. Thread 4. Needles 5. Scissors. 6.Glue. 7.Wire 8.Safety pins 9.Beads 10.Iron 11.Iron 12.Frame
Slide 8
 5. Manufacturing of the product Drawing up criteria for the future product. Interior products - paintings, photo frames, pillows, boxes and bags for cosmetics - must correspond to the overall design and form a single whole. The color of the ribbons should be chosen so that the combination is harmonious. Products must be well ironed and decorated
Slide 9
 Technological map for manufacturing the product Selected the fabric Measured the required size 60*30 Cut strips of brown and beige satin ribbon for the basket Placed in the center and glued
Slide 10

Slide 11
 We made roses from red, pink, white, yellow satin ribbon. We arranged the roses in a chaotic order and sewed them. We made leaves for the roses from green satin ribbon and sewed them on. We prepared beaded butterflies in advance, placed them on the panel and sewed them on. The finished product was ironed. The panel was inserted into a frame. To work looked complete, roses with leaves were glued to the frame
Slide 12

Slide 13

Slide 14
 -Economic justification. Item Color/material Length/quantity Price 1 piece Total Green fabric 1 m Available Threads Black 1 piece 10 rub. 10 rub. Red 1 piece 10 rub. 10 rub. White 1 piece 10 rub. 10 rub. Yellow 1 piece 10 rub. 10 rub. Pink 1 piece 10 rub. 10 rub. Set of needles Metal 10pcs 2rub. 20 rub. Wooden frame 1 piece 170 rub. 170 rub. Beads White 1p. 20 rub. 20 rub. Black 1p. 20 rub. 20 rub. Blue 1p. 20 rub. 20 rub. Yellow 1p. 20 rub. 20 rub. Red 1p. 20 rub. 20 rub. Ribbons 0.5 cm White 10m 10rub. 100 rub. Red 10m 10rub. 100 rub. Yellow 10m 10rub. 100 rub. Pink 10m 10rub. 100 rub. Green 4m 10rub. 40 rub. Total 780 rub.
Slide 15
 -Ecological justification. When carrying out a project, it is necessary to take into account that the product is environmentally friendly and does not cause harm to the health of yourself and others. Conclusions and conclusions: The implementation of the project contributes to the development and improvement of one’s capabilities in the field of cutting and sewing, as well as project activities; mastering technological skills; development of artistic taste and creative attitude to the work performed. The painting project we had planned has been completed. In general, it turned out what we had in mind at the beginning of the work. We consider the goals set at the beginning of the project to be achieved.
 Slide 19
 7. Bibliography 1. Donatella Ciotti “Embroidery with silk ribbons” M. “AST-PRESS” 2003, translation from Italian. 2. Joan Gordon “Ribbon Embroidery” encyclopedia ART-SPRING 2008 Translation from English. 3. Helen Dafter “Fantasies from Silk Ribbons” CONTENT 2007 translation from English. 4. The art of ribbon embroidery. Chernova A.G. – Ed. 7 – e. - Rostov N/D: Phoenix, 2006. Information resources http://images.yandex.ru/yandsearch?text=lilac%20ordinary&nl=1&stype=image http://images.yandex.ru/yandsearch?p =1&from_pos=24&ed=1&text=embroidery%20ribbons%20on%20clothes&rpt=image http://volsk-sch4.edusite.ru/DswMedia/vuhivka_lentami.doc
Articles on the topic